Streamline data entry by embedding Google Forms in Google Sheets
If you work with spreadsheets a lot, you've probably encountered data entry errors. Ensuring the quality and accuracy of data in spreadsheets is hard to do and this is a big problem that many organizations face. When errors creep into spreadsheets during data entry, they often go unnoticed and can result in erroneous conclusions. Garbage in, garbage out!
There are two common ways to prevent data entry errors from wreaking havoc in your spreadsheet:
Leverage data validation rules and conditional formatting to flag mistakes in your spreadsheet. This will not prevent the error from creeping in but will hopefully make you notice them before it is too late.
Enter data using forms to ensure data quality and consistency during the data entry process itself. You can add validation rules to forms to ensure that the data being entered passes basic validation checks.
For those of you that use Google Forms to enter data into a Google Sheets spreadsheet, you probably know how to open the form in a separate window and then use it to enter data.
One issue with this approach is that you need to keep referring back to the spreadsheet to ensure you did not inadvertently miss entering data. Imagine entering a list of 50 employee names into a spreadsheet from a printout. It's pretty easy to miss entering a few rows and when you end up with 46 rows when you should have 50, you'll spend a lot more time trying to identify the rows that you missed entering.
Can this be made more seamless? The answer is yes! With just a few lines of Google Apps Script code you can embed the Google Form directly into Google Sheets spreadsheet.
In this tutorial, I will show you how you can streamline data entry and minimize data entry errors by embedding the Google Form in the Google Sheets spreadsheet using Google Apps Script.
We will be working with a simple spreadsheet that has three columns: First name, Last name and Department. We will be using a Google Form to enter this data into our spreadsheet so there will also be a Timestamp column that is automatically created when you insert a form into the spreadsheet.

Instead of opening the form in a separate window, we will be building the following streamlined experience where the form is embedded directly in the spreadsheet.
Prerequisites
This tutorial assumes that you're familiar with the following concepts:
Basic coding concepts and the basics of coding using Google Apps Script
Familiarity with Google Forms
3 steps to streamline data entry by embedding a Google Form in the Google Sheets spreadsheetStep 1 — Open your Google Sheets spreadsheet and create a Google Form to enter data into it.
Step 2 —Write Apps Script code to embed the Google Form in your Google Sheets spreadsheet.
Step 1 — Open your Google Sheets spreadsheet and create a Google Form to enter data into it
Step 1 — Open your Google Sheets spreadsheet and create a Google Form to enter data into it.
Step 2 —Write Apps Script code to embed the Google Form in your Google Sheets spreadsheet.
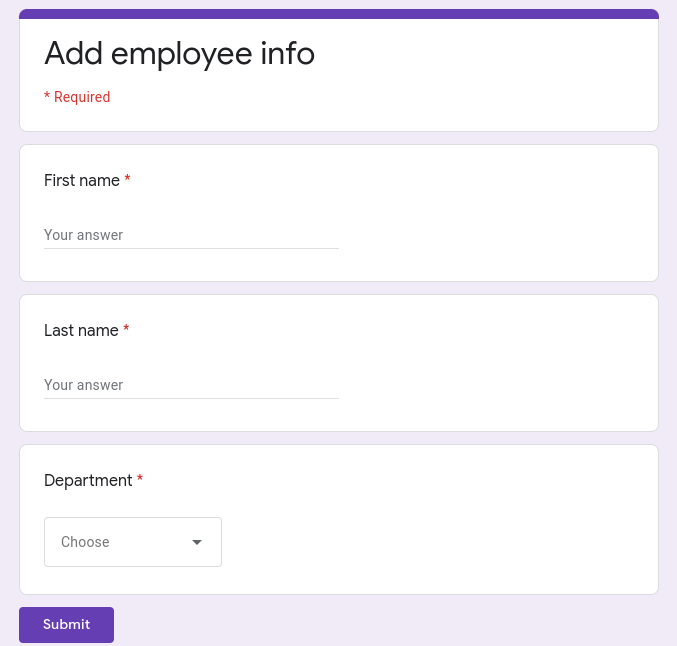
In this tutorial I'm using a simple Google Form that has three fields: First name, Last name and Department. Please feel free to create a form based on your requirements.
Step 2 —Write Apps Script code to embed the Google Form in your Google Sheets spreadsheetStep 2.1 — Open the Apps Script editor from your Google Sheets spreadsheet
Select Extensions —> Apps Script to open the Apps Script editor.
Step 2.2 — Create the HTML to embed the form in a sidebar widget
First, open the Apps Script editor and add a new HTML file called Sidebar.html.
Then, get the embed code for the Google Form and paste it into the <body> section of the HTML. Change the width to 100% by setting width="100%". You can tweak the height later after seeing the embedded form.
How to get the embed code for the Google Form?
To get the embed code, click the Send button, choose <> and then copy the embed code.
When you are done, your Sidebar.html file should have the following code. If you copy paste the code below, please ensure that you replace <your-form-id> with the actual id of your form.
<!DOCTYPE html>
<html>
 <head>
   <base target="_top">
 </head>
 <body>
   <iframe src="https://docs.google.com/forms/d/e/<your-form-id>/viewform?embedded=true" width="100%" height="700" frameborder="0" marginheight="0" marginwidth="0">Loading…</iframe>
 </body>
</html>
Step 2.3 — Display the sidebar when users select a menu item from a custom menu
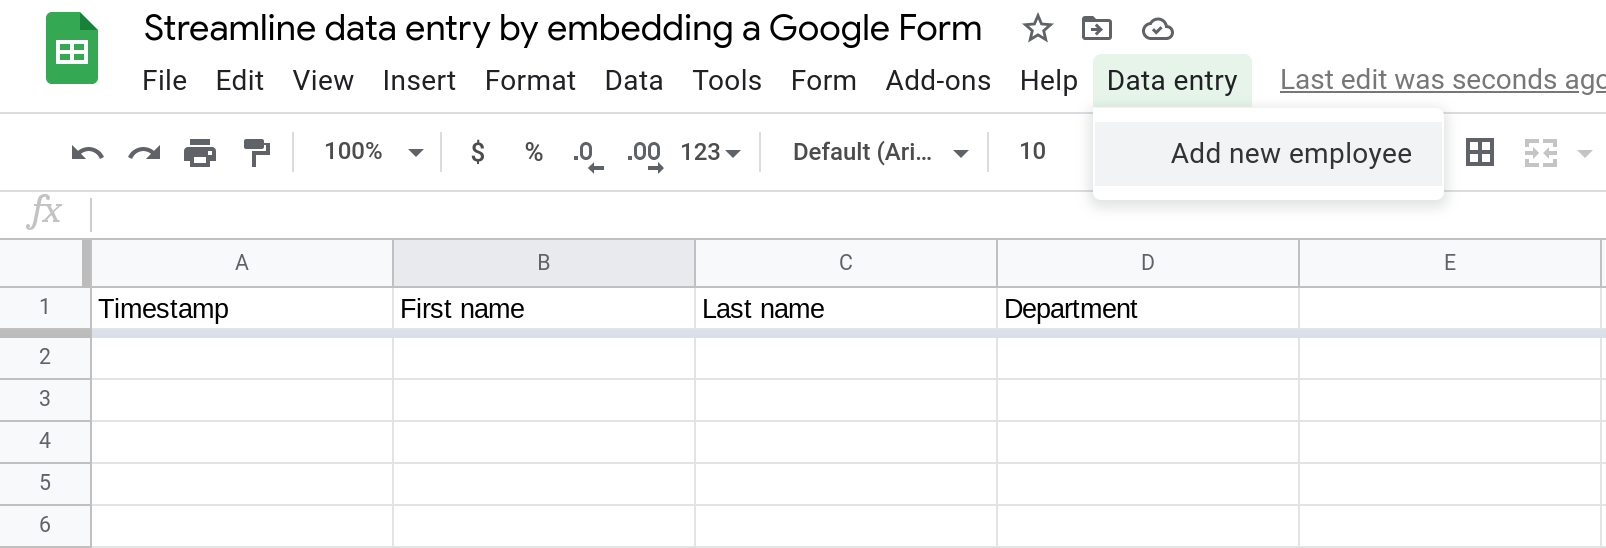
First, we will create a custom menu called "Data entry" with a single menu item called "Add new employee". When this menu item is selected, the function showSidebar() will be run and this function will display the sidebar widget containing the embedded form.
//@OnlyCurrentDoc

function onOpen() {
 SpreadsheetApp.getUi().createMenu("Data entry").addItem("Add new employee", "showSidebar").addToUi();
}

function showSidebar() {
 SpreadsheetApp.getUi().showSidebar(HtmlService.createHtmlOutputFromFile("Sidebar.html").setTitle("Enter data"));
}
Step 3 — Test entering data from the embedded Google Form to confirm that everything works correctly
Now that you have set everything up, it is time to test the functionality. To open the data entry form, select the Add new employee menu item from the Data entry custom menu that you created using Apps Script.
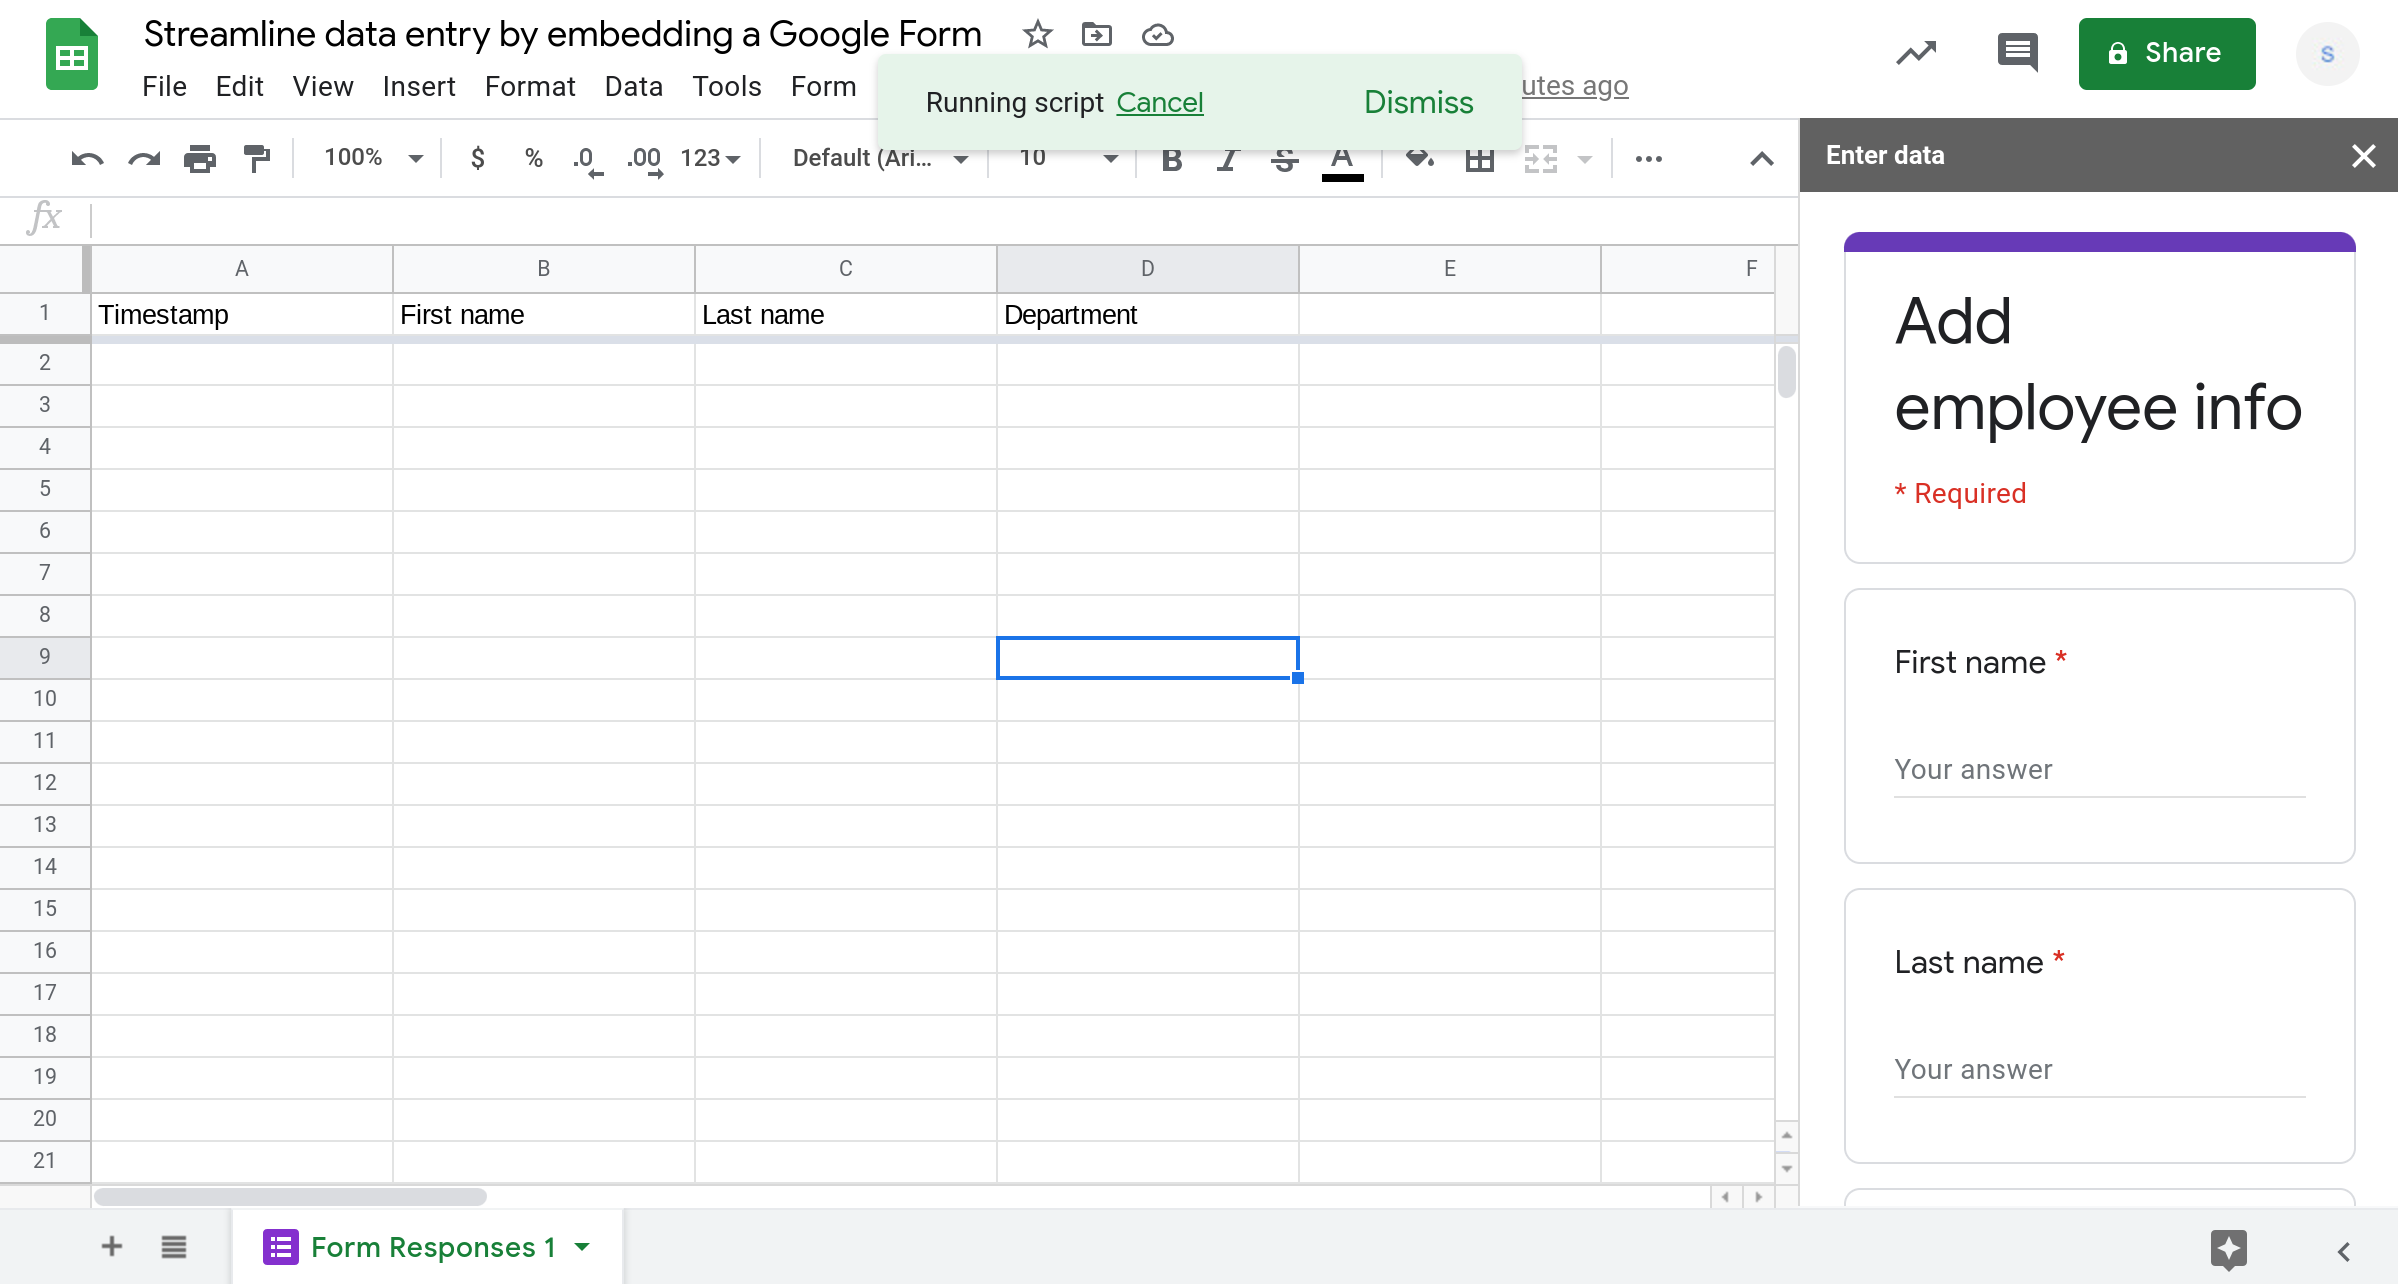
The Google Form will be displayed in a sidebar and you can use it to enter the details of a new employee. You can validate the data being entered by adding data validation rules to the Google Form.
As soon as you hit submit, a new row will appear in the spreadsheet displaying the information that you entered.
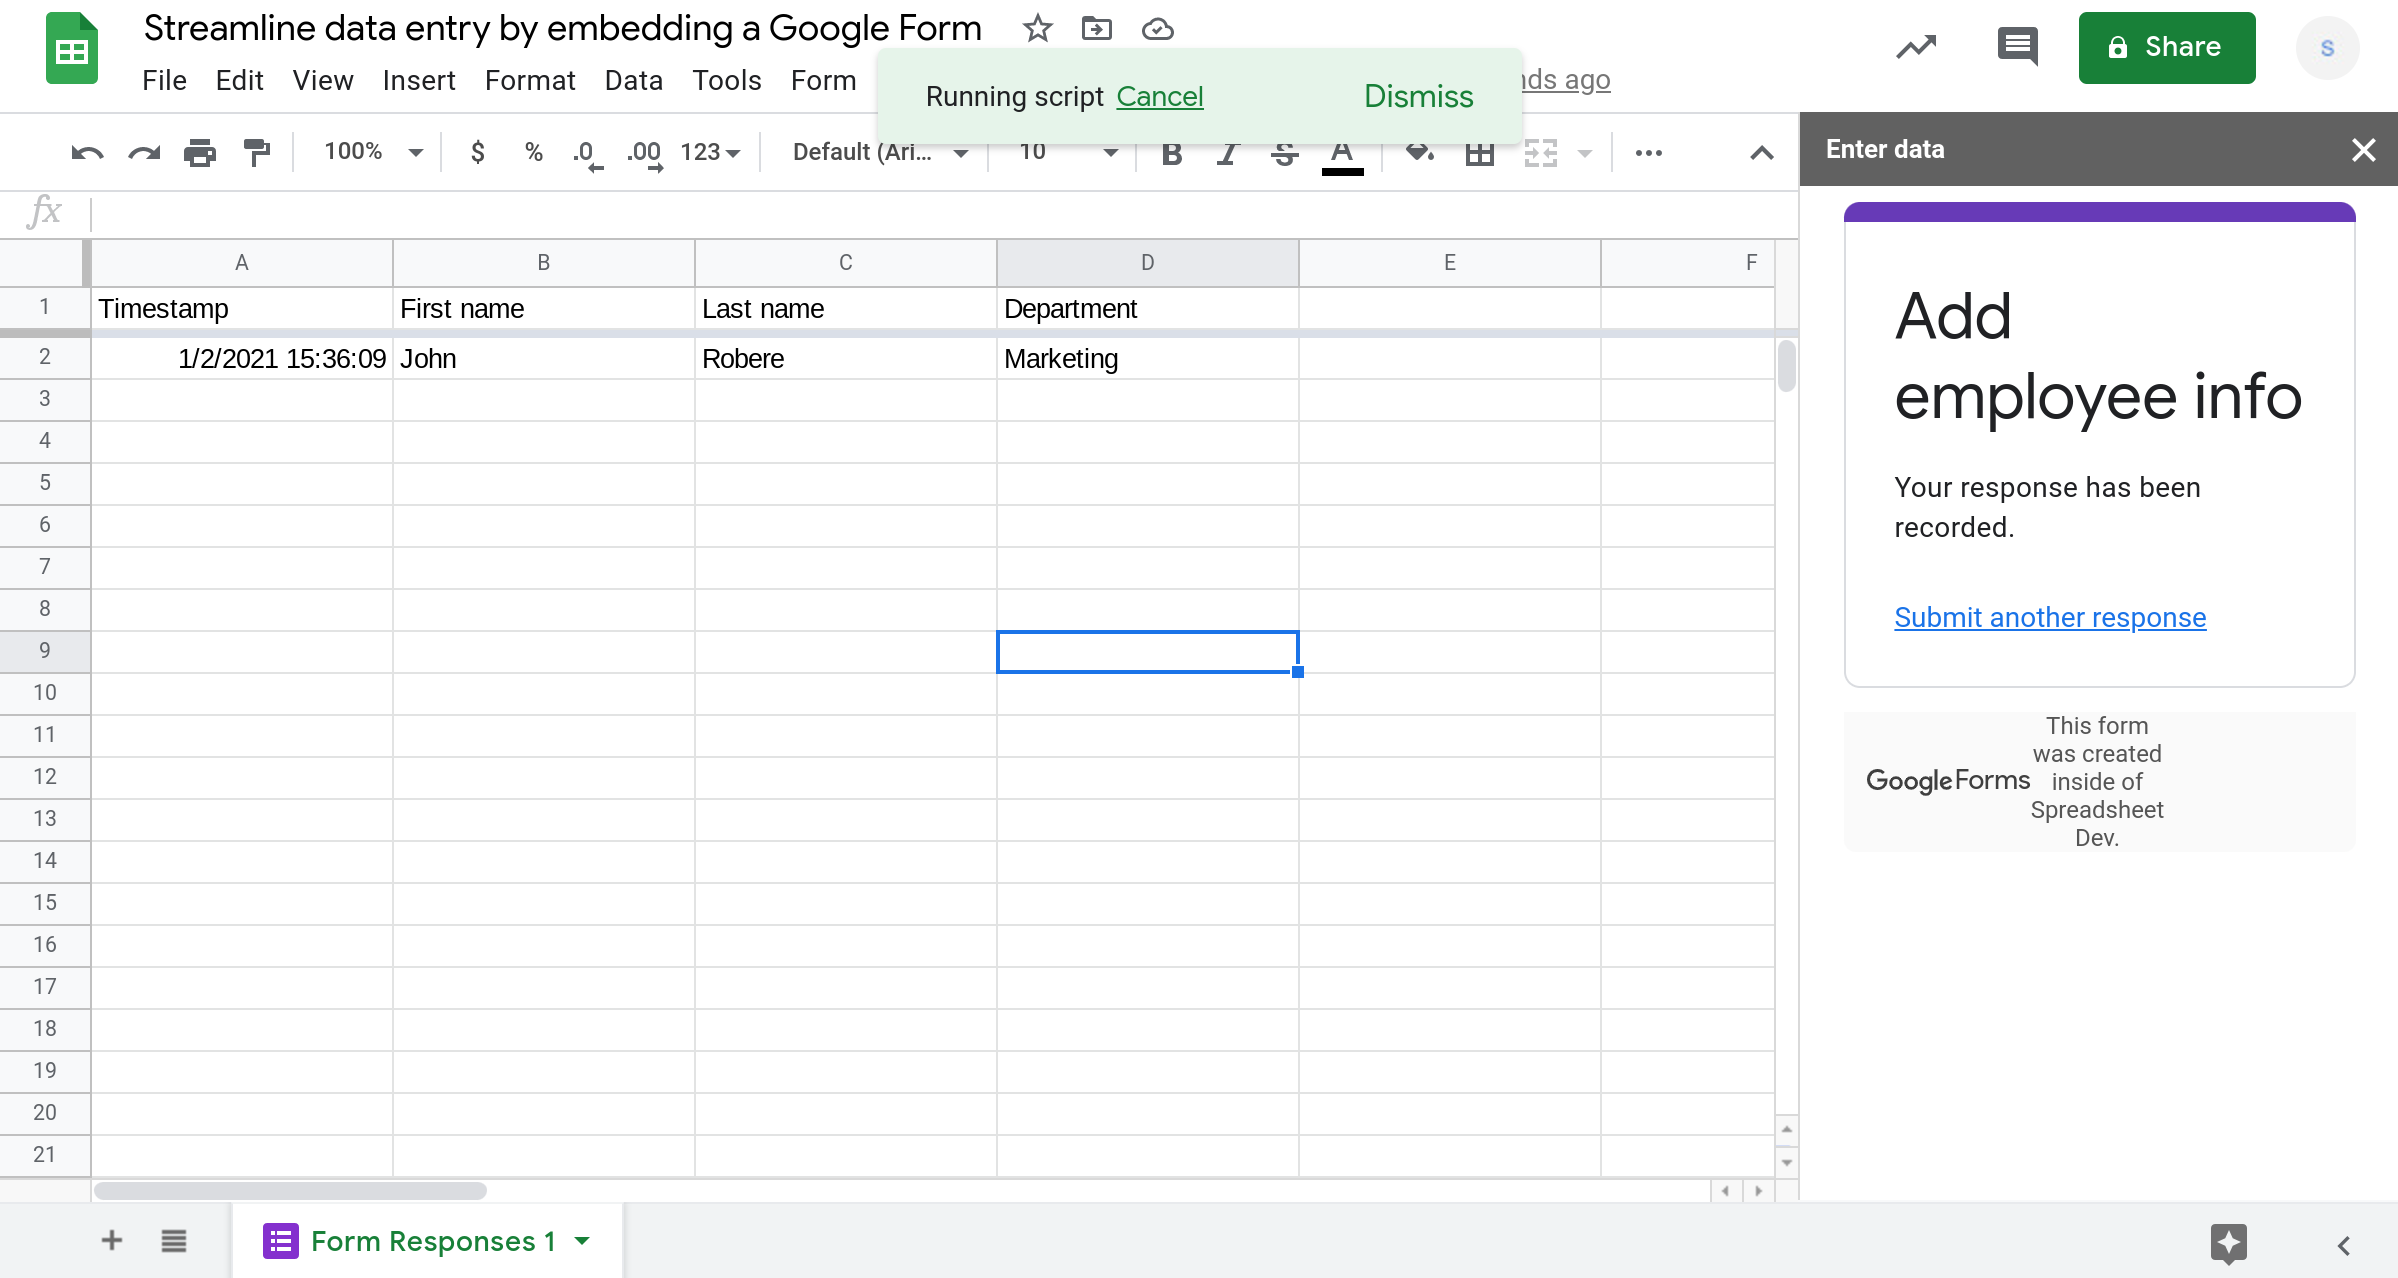
Once you add an employee, you can select Submit another response to add another employee.
That's it! You'll now be able to see the data you enter appear immediately in your spreadsheet. What is even better is that you can see all the existing data while entering a new row. Therefore, if you are entering data from a printout, you don't need to remember the last row you entered since this information is right in front of you.
Your spreadsheet will now benefit from fewer data entry errors and data inconsistency issues! All of this was made possible because of just 10 lines of Apps Script code. This is why I believe knowledge of Apps Script coding is truly a super power that can help everyone become more productive.
Tip: Automatically sort Google Form responses to ensure the latest entry is always at the top
If you're entering several rows of data, you might have to scroll to the bottom to see new rows that you add. This is because new form responses get appended to the bottom of the spreadsheet. You can use Apps Script to change the sorting so that newly added rows always show up at the top of the spreadsheet. I've written a tutorial that walks you through how to implement the functionality to automatically sort Google Form responses. If you routinely enter lots of data manually, this tip could help increase your productivity even more!
Conclusion
Data entry errors in spreadsheets are more common than one would expect. In this tutorial, I showed you how to streamline your data entry process by embedding a Google Form in your Google Sheets spreadsheet. This will let you see the data you're entering in real-time while leveraging data validations provided by Google Forms. In addition, you can also use spreadsheet data validation and conditional formatting to further ensure data quality.
By making data entry more robust, you can increase the quality of data in your spreadsheet and thereby increase the quality of decisions that are based on this data.
In this tutorial you learned how to embed a Google Form in a sidebar within Google Sheets and how to open the sidebar from a custom menu.
If you had difficulty understanding any concept in this tutorial or if you could not get the code to work, I'd love to hear from you using the form below so I can make it more useful. Thank you!
Thanks for reading!
How was this tutorial?
Your feedback helps me create better content
DISCLAIMER: This content is provided for educational purposes only. All code, templates, and information should be thoroughly reviewed and tested before use. Use at your own risk. Full Terms of Service apply.
Small Scripts, Big Impact
Join 1,500+ professionals who are supercharging their productivity with Google Sheets automation
By subscribing, you agree to our Privacy Policy and Terms of Service