Sending email from Google Sheets
I'm writing a series of posts that cover various aspects of sending email from Google Sheets. There are so many workflows and processes at work that revolve around spreadsheets and email that I decided to write a comprehensive guide on this topic.

Here are a few common use cases:
Sending an email notification whenever a spreadsheet is edited.
Sending an email notification when a specific column or row is updated.
Sending an email notification when a specific cell is updated.
Sending an email summary every week based on the data in the spreadsheet.
Sending a daily reminder to enter data in a spreadsheet.
Alerting by email when the data in a spreadsheet does not meet a certain condition.
etc.
I can keep listing use cases but you get the gist. It's almost as if email and spreadsheets were invented for one another! Then if you add in Google Forms, the combo becomes even more powerful.
Prerequisites
In this series of posts, I'm going to assume that you know the basics of coding using Apps Script. If you don't know coding or if you've never used Apps Script before, I've written a series of posts to teach you how to code using Google Sheets and Apps Script.
Two ways to send email from Google Sheets
There are two ways to send email from Google Sheets. You can either use a Google provided library or use a third party email service provider like MailChimp or SendGrid.
Using a Google provided library to send emails from Google Sheets
Google provides two Apps Script libraries (MailApp and GmailApp) that make it very easy to send emails from Sheets. These libraries will work great for personal or work related use cases where you want to send a small number of emails.
Using a third party email service to send emails from Google Sheets
Google places several restrictions and quota limitations on the libraries it provides to prevent abuse and spam. Therefore, you can't use them for sending a large volume of emails. That's where third party providers like SendGrid come in. In a future post, I'll show you how to send emails via SendGrid or MailChimp from Google Sheets. That being said, if your goal is to send millions of emails, you shouldn't be using a Google Sheets based solution in the first place.
Limitations and quota restrictions for sending email via MailApp or GmailApp
The restrictions and limits depend on whether you're using a Gmail or G Suite account. The limits are usually higher for G Suite accounts since it is a paid offering.
Restriction | Limit for Gmail accounts | Limit for G Suite accounts |
|---|---|---|
Email recipients per day | 100 | 1500 |
Email recipients per message | 50 | 50 |
Email attachments | 250 / message | 250 / message |
Email body size | 200 kB / message | 400 kB / message |
Email total attachments size | 25 MB / message | 25 MB / message |
Use the MailApp instead of the GmailApp to send emails
While both libraries support sending email and have the same restrictions and quotas, you should use the MailApp instead of the GmailApp to send emails. In order to use the GmailApp library, you'll need to authorize your script to access your Gmail account. I personally try and avoid giving apps access to my email account unless absolutely necessary. In this case there's a readily available alternative so please use the MailApp library instead.
Sending email using the MailApp library
First, create a new Google Sheet or open an existing one that you plan to send emails from. Then open the script editor by selecting Extensions → Apps Script. If you're not sure how to do this, I've written a tutorial on creating your first Apps Script that goes into more detail.
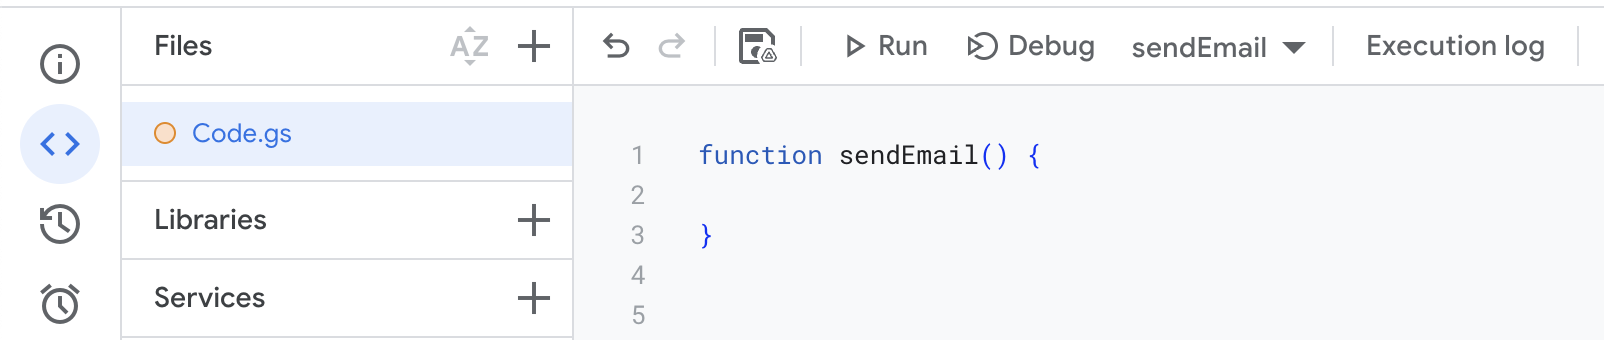
Rename the function from myFunction to sendEmail.
The MailApp library has two methods: sendEmail() to send emails, and getRemainingDailyQuota() to find out how many more emails you can send that day before you run out of your daily quota.

The simplest way to send an email is by calling the MailApp.sendEmail() method with the recipient, subject and body of the email.
⚠ Please replace the email address in the code snippet below with your email address.
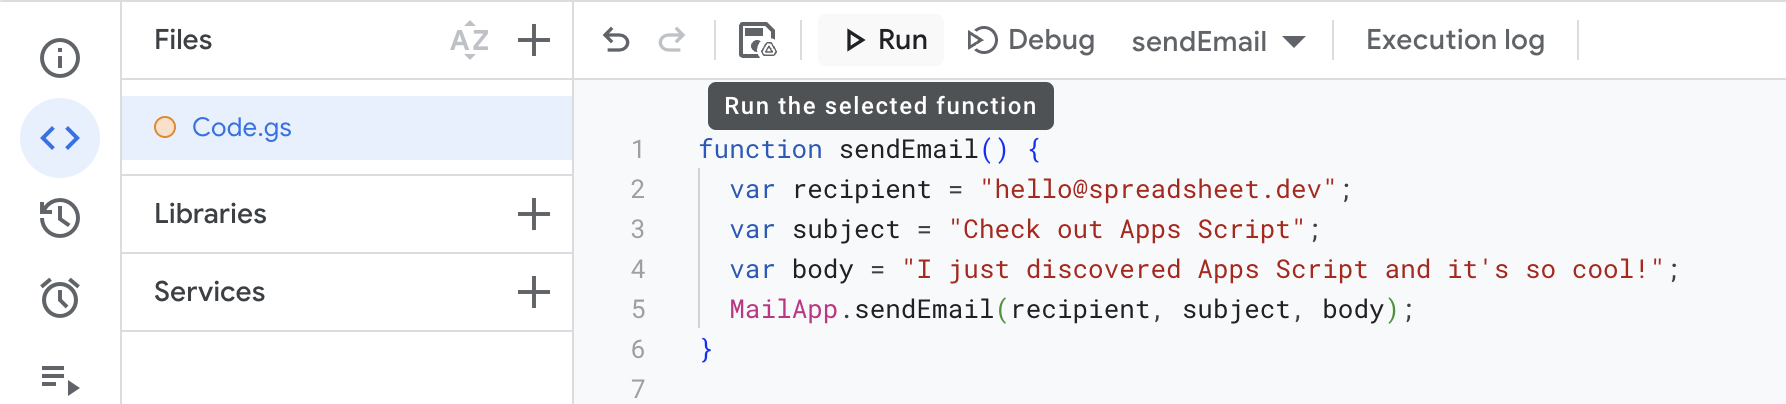
function sendEmail() {
  var recipient = "youremail@example.com";
  var subject = "Check out Apps Script";
  var body = "I just discovered Apps Script and it's so cool!";
  MailApp.sendEmail(recipient, subject, body);
}
To send the email, you need to run the code. You can do that by clicking the Run button.
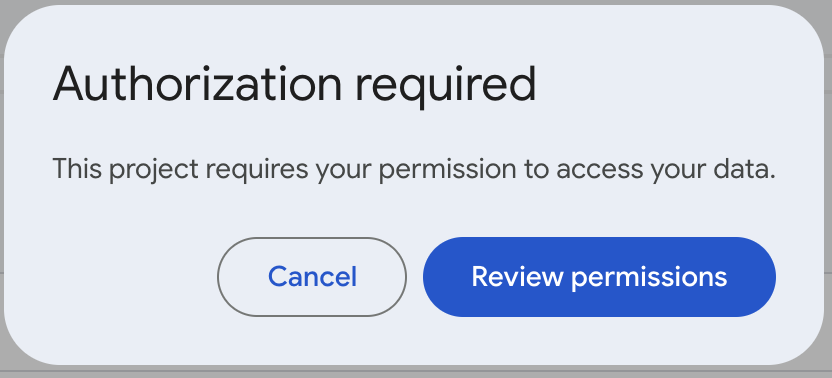
When you run the code, you'll be asked to authorize it. This is because your code is going to send an email on your behalf and Google wants you to confirm that you're OK with that. Select Review Permissions to continue.
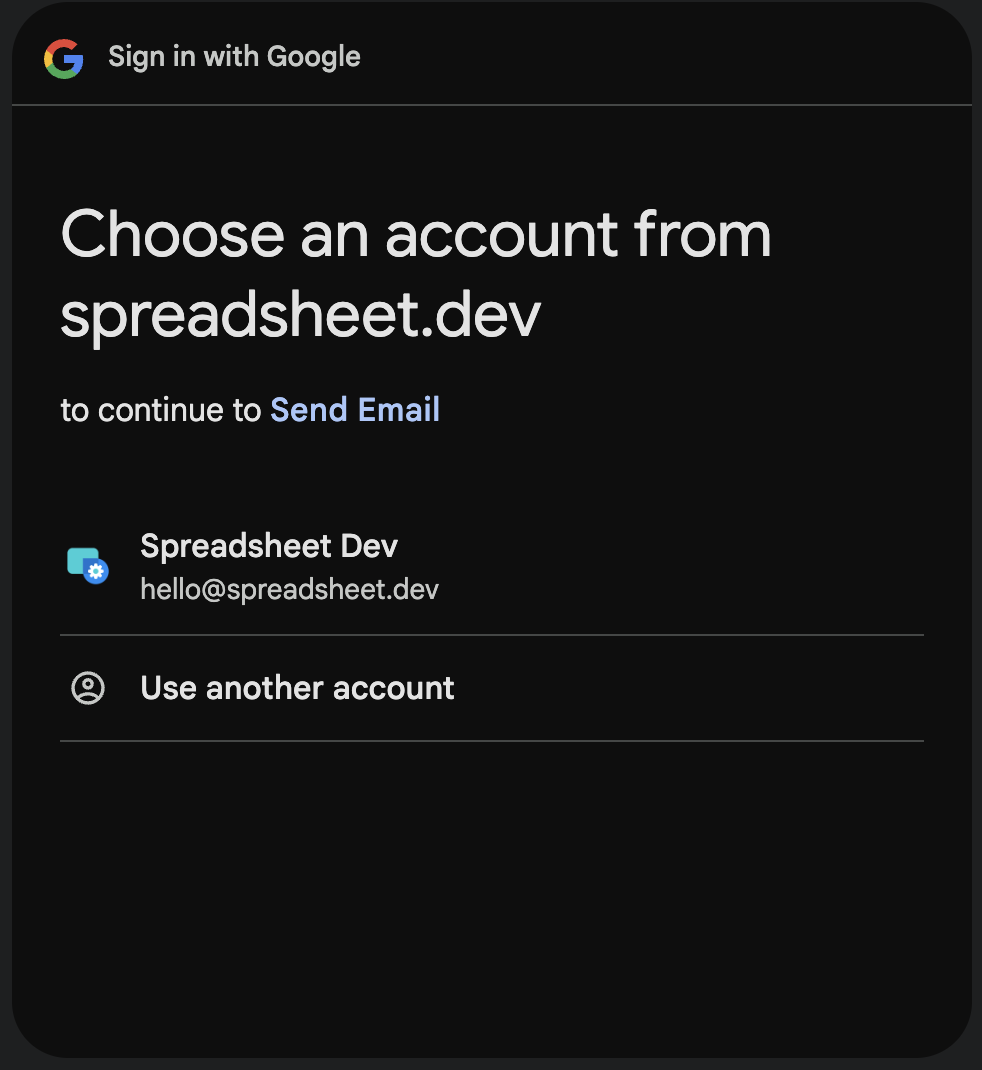
Select the Google account (Gmail or G Suite) that you want to authorize. Usually this will be the same account as the one that you used to create your spreadsheet.
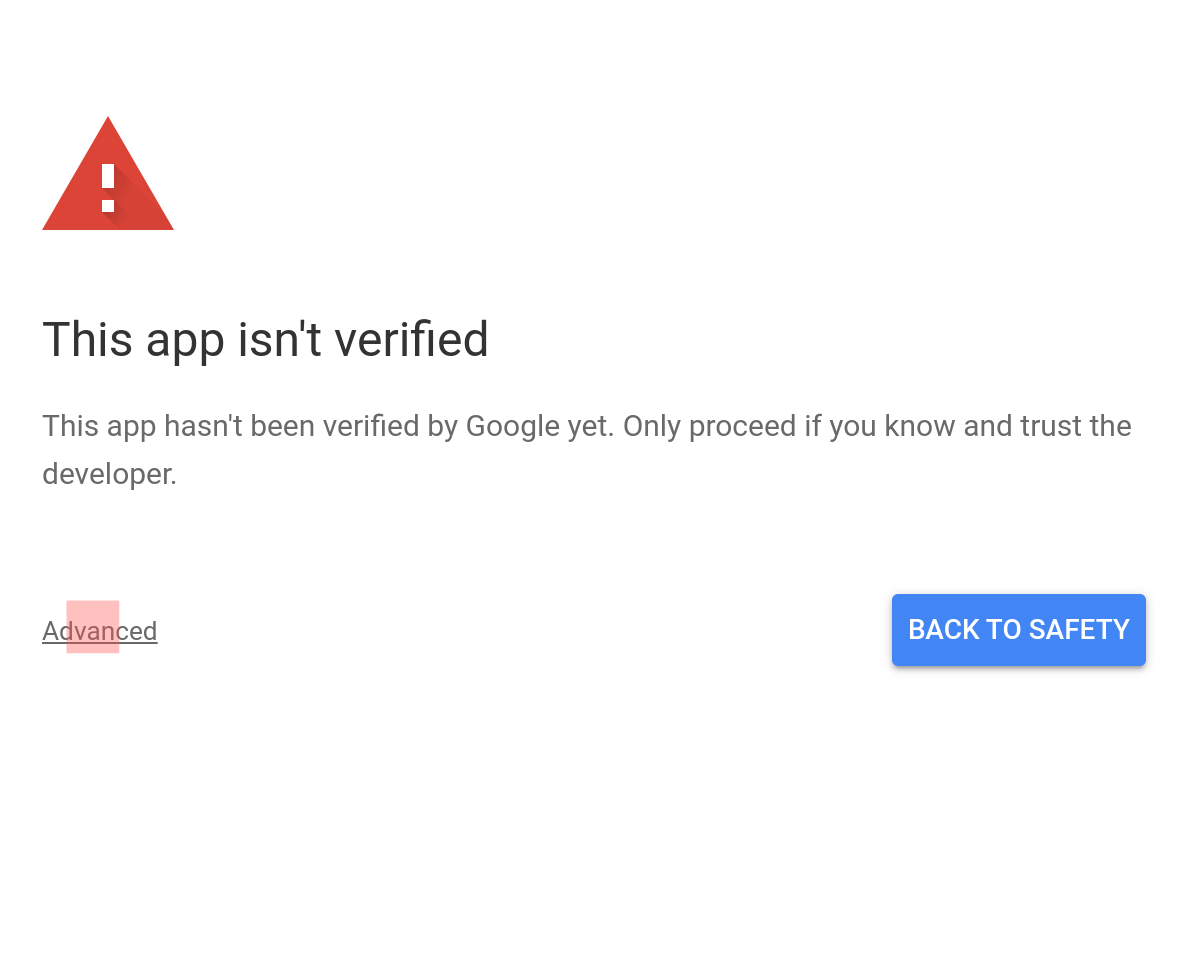
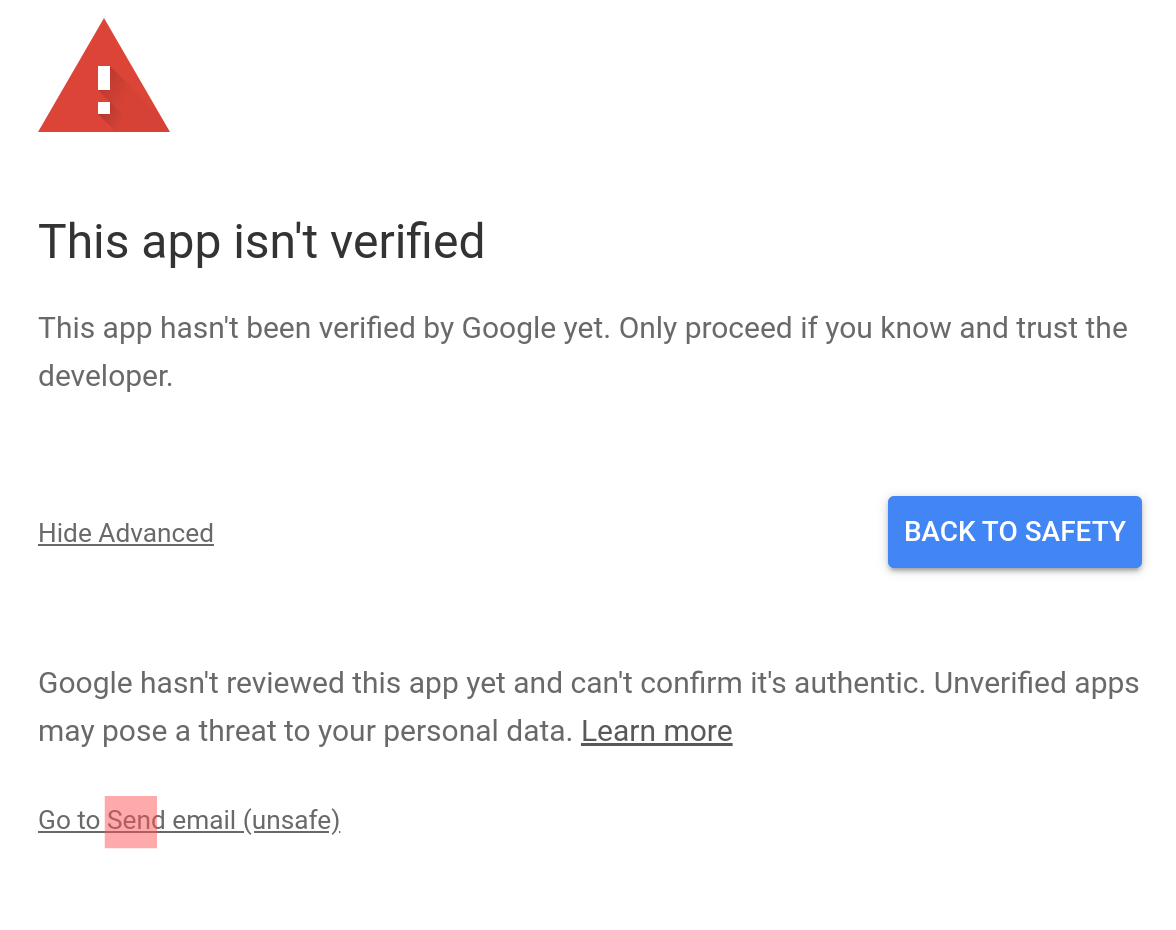
Once you select your account, Google will warn you that your app isn't verified. Google has a verification process to ensure that developers are following best practices with respect to security and privacy when building apps that other people will use. In this case, since you built the app and you'll be its only user, it's fine to proceed.
Select Advanced and then select Go to <your app name> to continue.
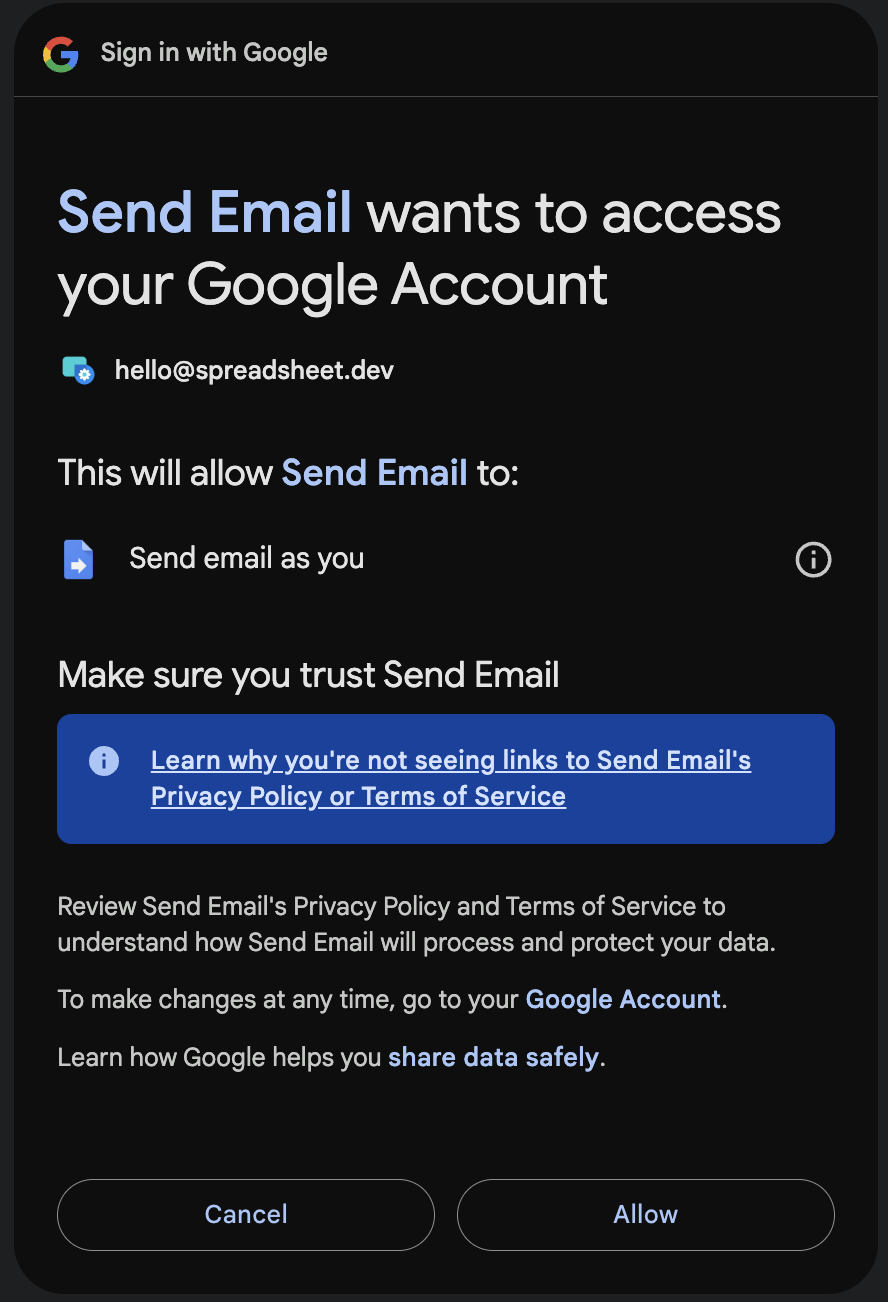
Google will now display the permissions that the script needs in order to run. The only permission listed is the ability to send email as you. This is exactly what you want the script to do so select Allow to authorize your script to send emails on your behalf.
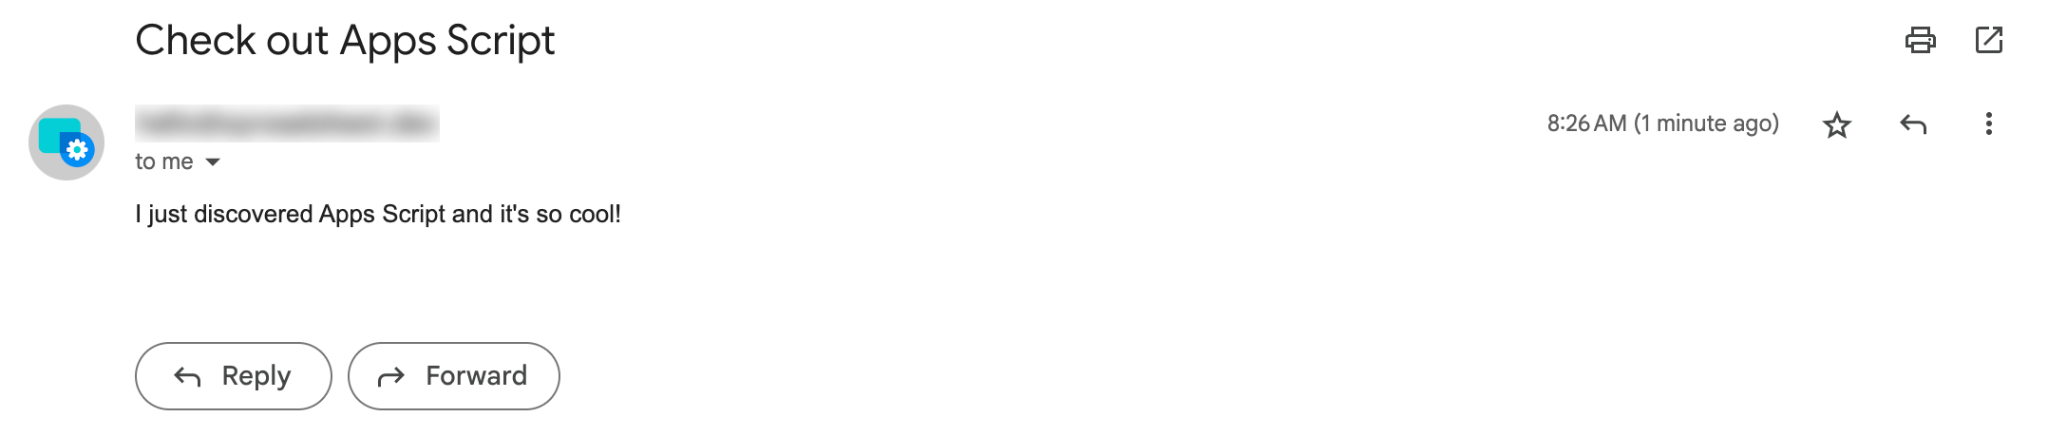
Once you authorize the script, it will run and you should receive the email in your inbox.
You only need to authorize your script once. When you run it again, it won't ask you for authorization, although Google will sometimes ask you to re-authorize your script once in a while.
Setting a different reply-to email address
By default, you'll receive replies to emails that your script sends at the same address that you used to send out the emails. This will usually work fine but sometimes you might want replies to go to some other address like your support team's email address.
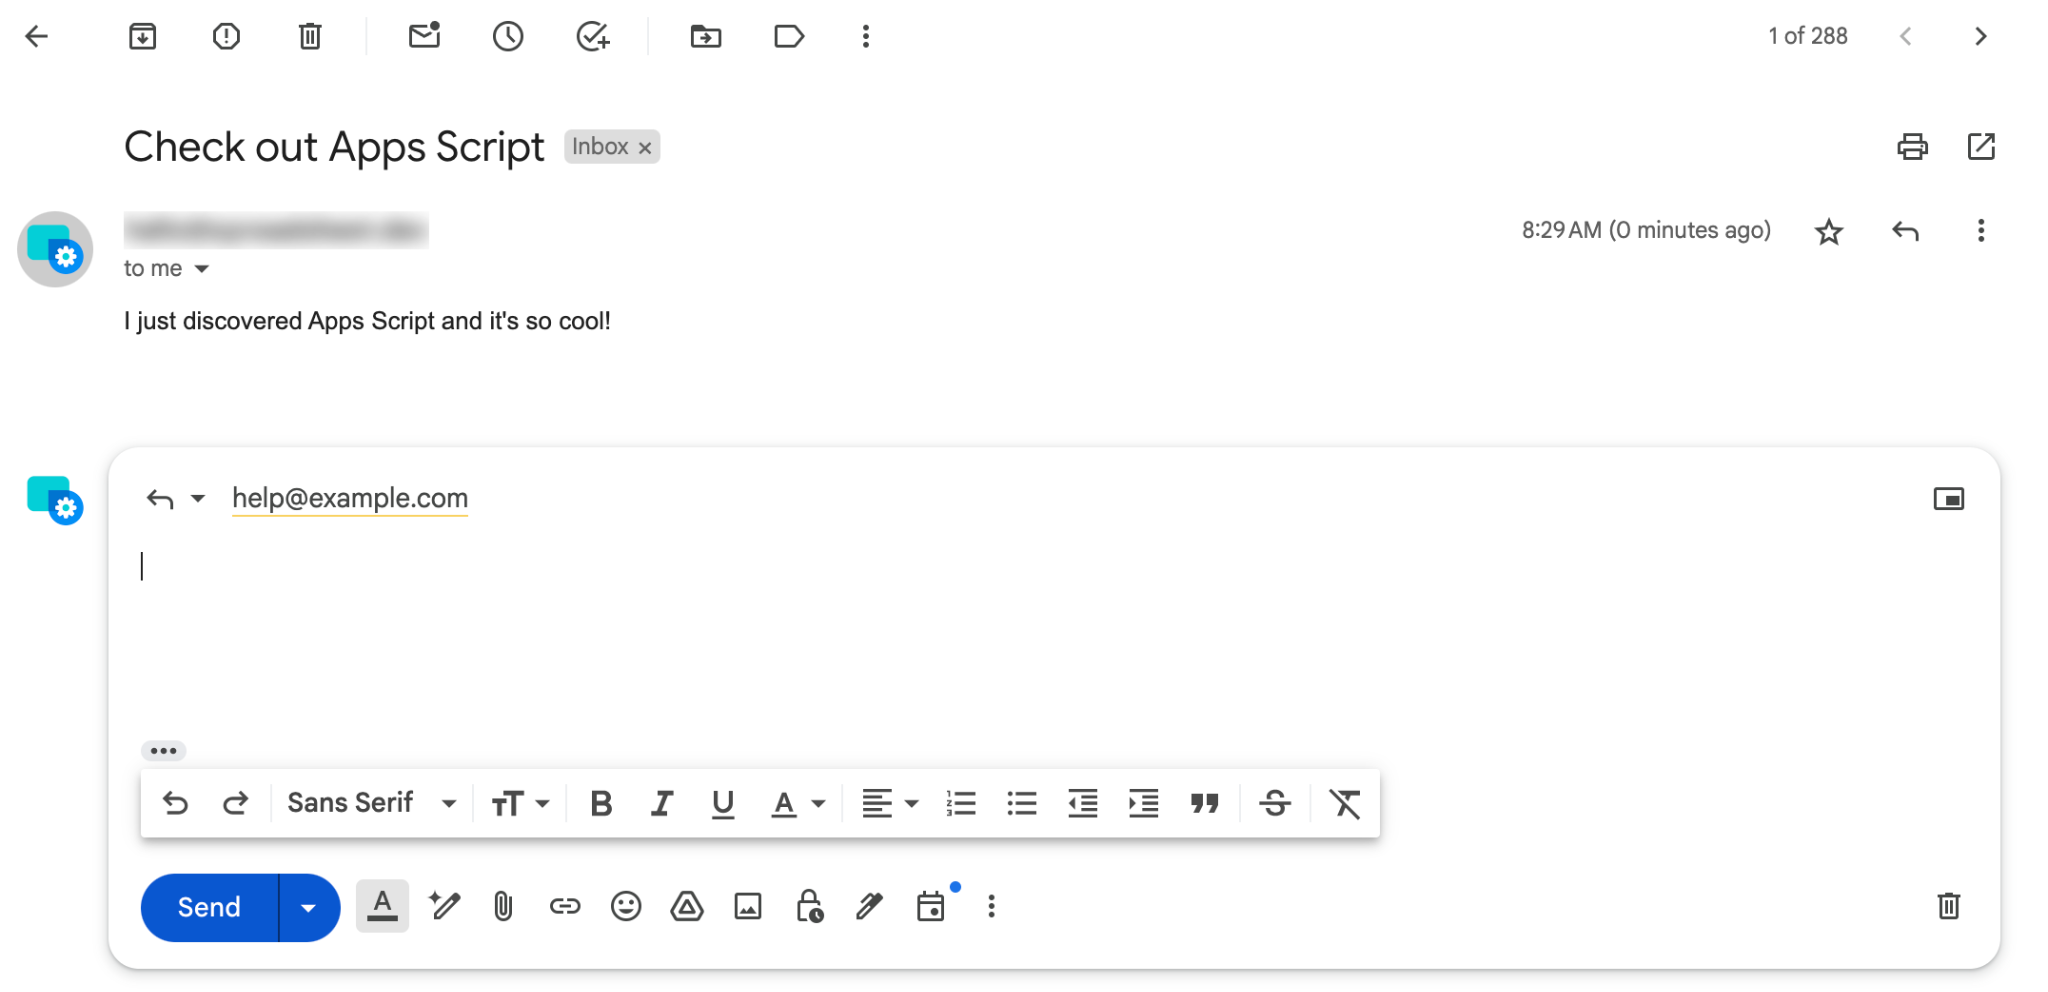
Setting this up is easy. All you need to do is to also include a reply-to address when calling the MailApp.sendEmail() method. I'm going to make up an imaginary support email address, help@example.com, for this example.
⚠ Please replace the email address youremail@example.com in the code snippet below with your email address.
function sendEmailWithReplyTo() {
  var recipient = "youremail@example.com";
  var replyToAddress = "help@example.com";
  var subject = "Check out Apps Script";
  var body = "I just discovered Apps Script and it's so cool!";
  MailApp.sendEmail(recipient, replyToAddress, subject, body);
}
Now, replies to emails that are sent by your script will go to help@example.com.
Setting email addresses as CC and BCC
You can set CC and BCC email addresses by calling MailApp.sendEmail() with an options object. If you want to include multiple CC or BCC addresses, separate them with a comma.
If you want to set a reply-to address and a CC or BCC address, include the reply-to address as a property of the object.
⚠ Please replace the email address youremail@example.com in the code snippet below with your email address.
function sendEmailWithCC() {
  var recipient = "youremail@example.com";
  var subject = "Check out Apps Script";
  var body = "I just discovered Apps Script and it's so cool!";
  var options = {
    cc: "cc@example.com",
    bcc: "bcc@example.com",
    replyTo: "help@example.com"
  }
  MailApp.sendEmail(recipient, subject, body, options);
}
You can also include the recipient, subject and the body of the email, along with other options in a single object.
When setting the recipient as part of the message object, use the property name "to" and not "recipient".
⚠ Please replace the email address youremail@example.com in the code snippet below with your email address.
function sendEmailMessage() {
  var message = {
    to: "youremail@example.com",
    subject: "Check out Apps Script",
    body: "I just discovered Apps Script and it's so cool!",
    cc: "cc@example.com",
    bcc: "bcc@example.com",
    replyTo: "help@example.com"
  }
  MailApp.sendEmail(message);
}
Setting the name of the sender
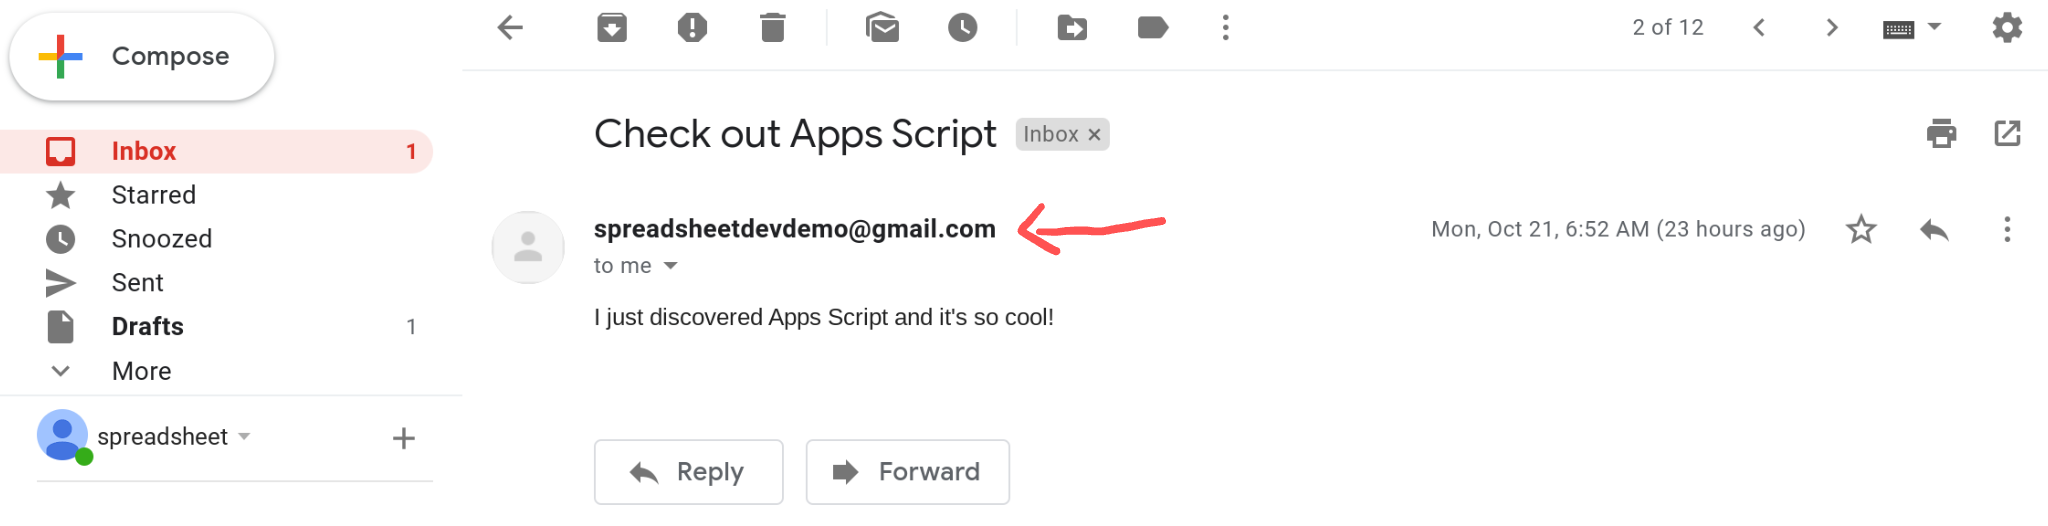
You can set the name of the sender by setting the name property in the message object. Here's the email that I received from my script prior to setting the name property.
Now let's set the name property and see what happens.
⚠ Please replace the email address youremail@example.com in the code snippet below with your email address.
function sendEmailMessage() {
  var message = {
    to: "youremail@example.com",
    subject: "Check out Apps Script",
    body: "I just discovered Apps Script and it's so cool!",
    cc: "cc@example.com",
    bcc: "bcc@example.com",
    replyTo: "help@example.com",
    name: "Spreadsheet Dev"
  }
  MailApp.sendEmail(message);
}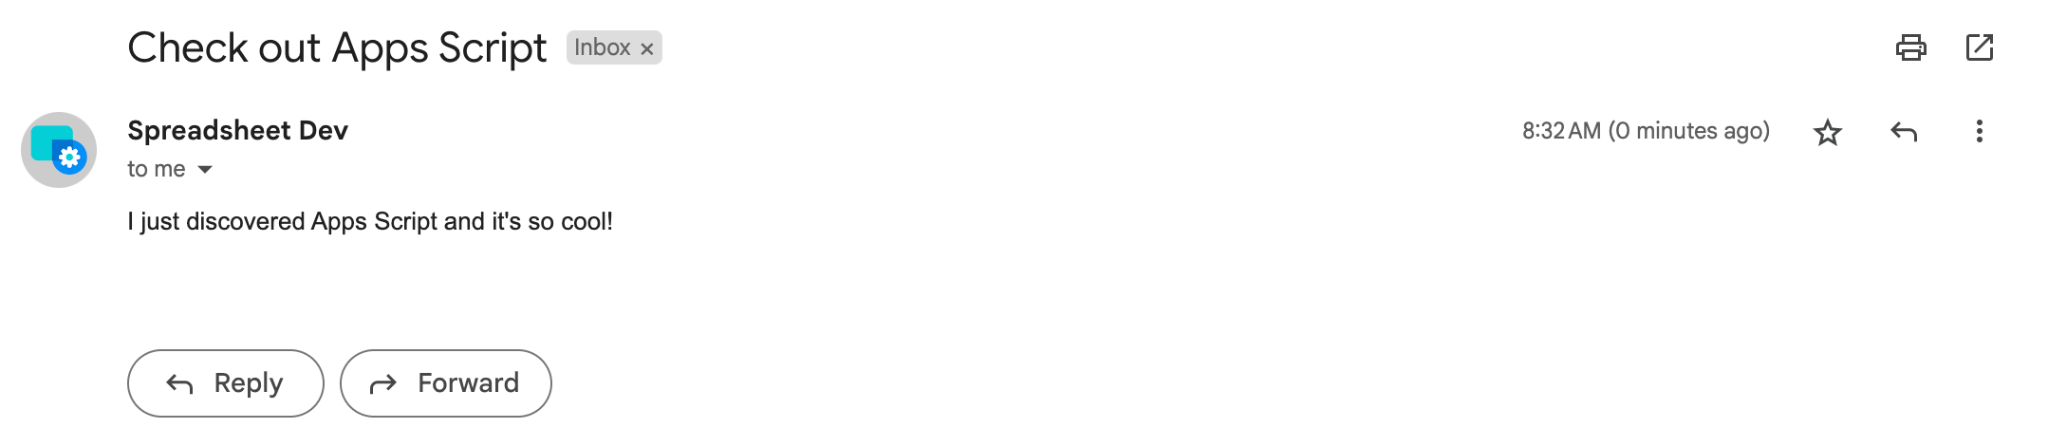
You'll notice that the name "Spreadsheet Dev" is displayed instead of the email address.
DISCLAIMER: This content is provided for educational purposes only. All code, templates, and information should be thoroughly reviewed and tested before use. Use at your own risk. Full Terms of Service apply.
Thanks for your feedback!
Your input helps improve the content for everyone.
