How to import CSV files into Google Sheets using Apps Script
In this tutorial, I'll show you how to use Apps Script to automatically import CSV files into Google Sheets from a URL or from Google Drive.
Comma-Separated Values (CSV) files are a very common file format for storing tabular data in the business world. For example, a salesperson might export a list of leads from their CRM system as a CSV file and then import this list into a Marketing Automation product to send emails. The CSV file format provides a convenient way to transfer tabular data from one application to another.
A common way to import CSV data into Google Sheets is by using the Import feature from the File menu. While this method works very well, this is a manual process and can be time consuming if your work involves importing lots of CSV files everyday. This tutorial will show you how to automate the process of importing CSV files by using Apps Script.
Prerequisites
This tutorial assumes that you're familiar with:
Google Sheets
Basic coding concepts (If you're new to coding, please check out a series of tutorials that I've written on learning to code using Google Sheets and Apps Script.).
Four steps to build an application that will let you import CSV files from a URL or from Google DriveStep 1 — Create a new Google Sheets spreadsheet or open an existing spreadsheet
Step 3 — Prompt the user for the URL or for the Google Drive Filename
Step 4 — Import the CSV file into a new sheet in the spreadsheet
Step 1 — Create a new Google Sheets spreadsheet or open an existing spreadsheet
Step 1 — Create a new Google Sheets spreadsheet or open an existing spreadsheet
Step 3 — Prompt the user for the URL or for the Google Drive Filename
Step 4 — Import the CSV file into a new sheet in the spreadsheet
Create a new spreadsheet or open an existing spreadsheet where you want to import CSV files.
★ Tip
You can create a new Google Sheets spreadsheet using one of the following links: https://sheets.new or https://spreadsheets.new.
Step 2 — Create a custom menu that will let users choose where to import the CSV file from: Google Drive or from a URL
Open the script editor by selecting Extensions —> Apps Script. Replace the existing code in the editor with the code below.
//@OnlyCurrentDoc
function onOpen(e) {
  var ui = SpreadsheetApp.getUi();
  ui.createMenu("Import CSV data 👉️")
    .addItem("Import from URL", "importCSVFromUrl")
    .addItem("Import from Drive", "importCSVFromDrive")
    .addToUi();
}

//Displays an alert as a Toast message
function displayToastAlert(message) {
  SpreadsheetApp.getActive().toast(message, "⚠️ Alert");
}

//Placeholder function to import CSV files from a URL
function importCSVFromUrl() {
  displayToastAlert("Import from URL.");
}

//Placeholder function to import CSV files from Google Drive
function importCSVFromDrive() {
  displayToastAlert("Import from Drive.");
}
Note
A "Toast" alert is a notification that automatically disappears after a few seconds.
The displayToastAlert() function displays notifications to the user. The code has two placeholder functions (importCSVFromUrl() and importCSVFromDrive()) that we will be working on in the rest of this tutorial.
Run the code by clicking the play icon. Once the script runs, you should see the "Import CSV data 👉" custom menu in your spreadsheet.
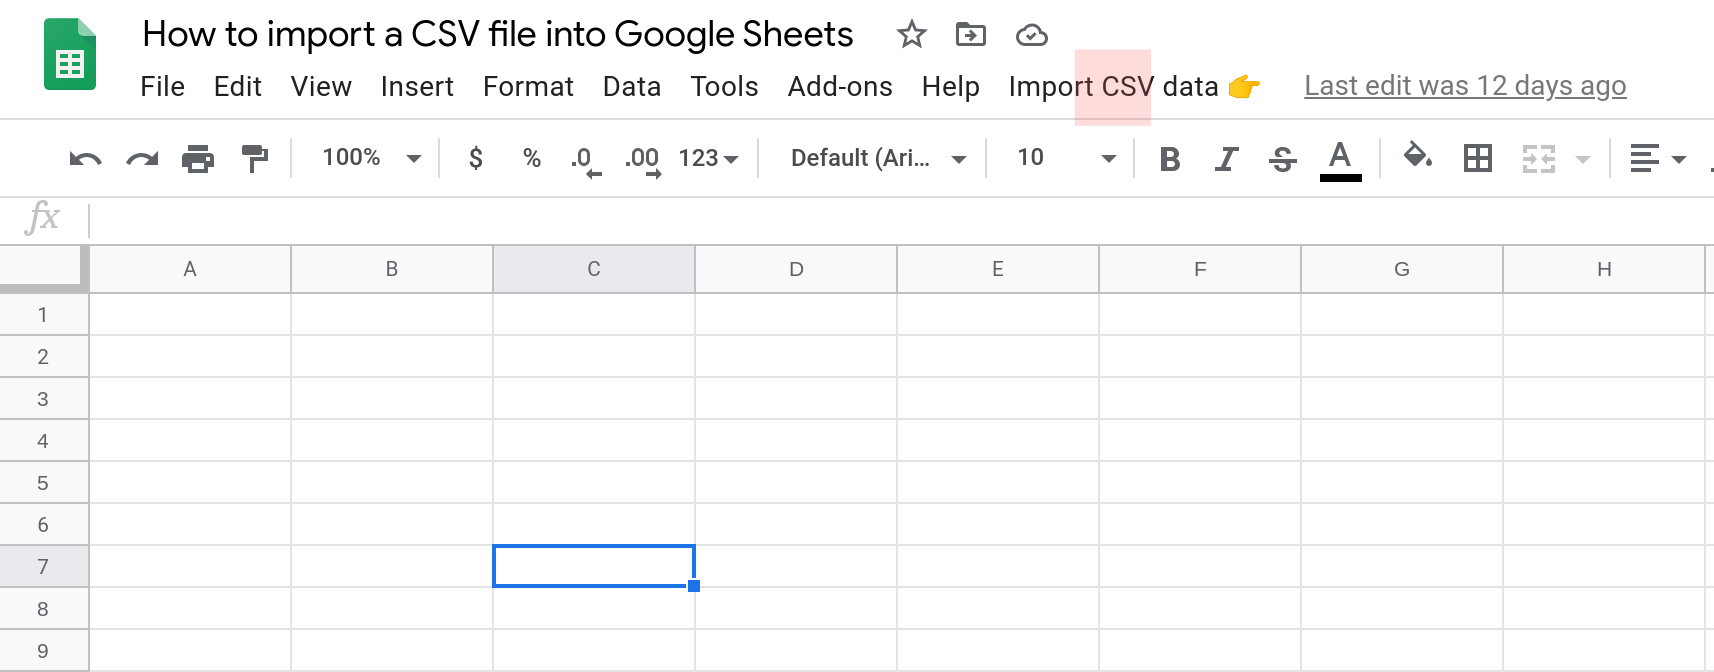
Try selecting an item from this menu.

When you select "Import from URL", you should see a notification in the lower right corner of the spreadsheet.
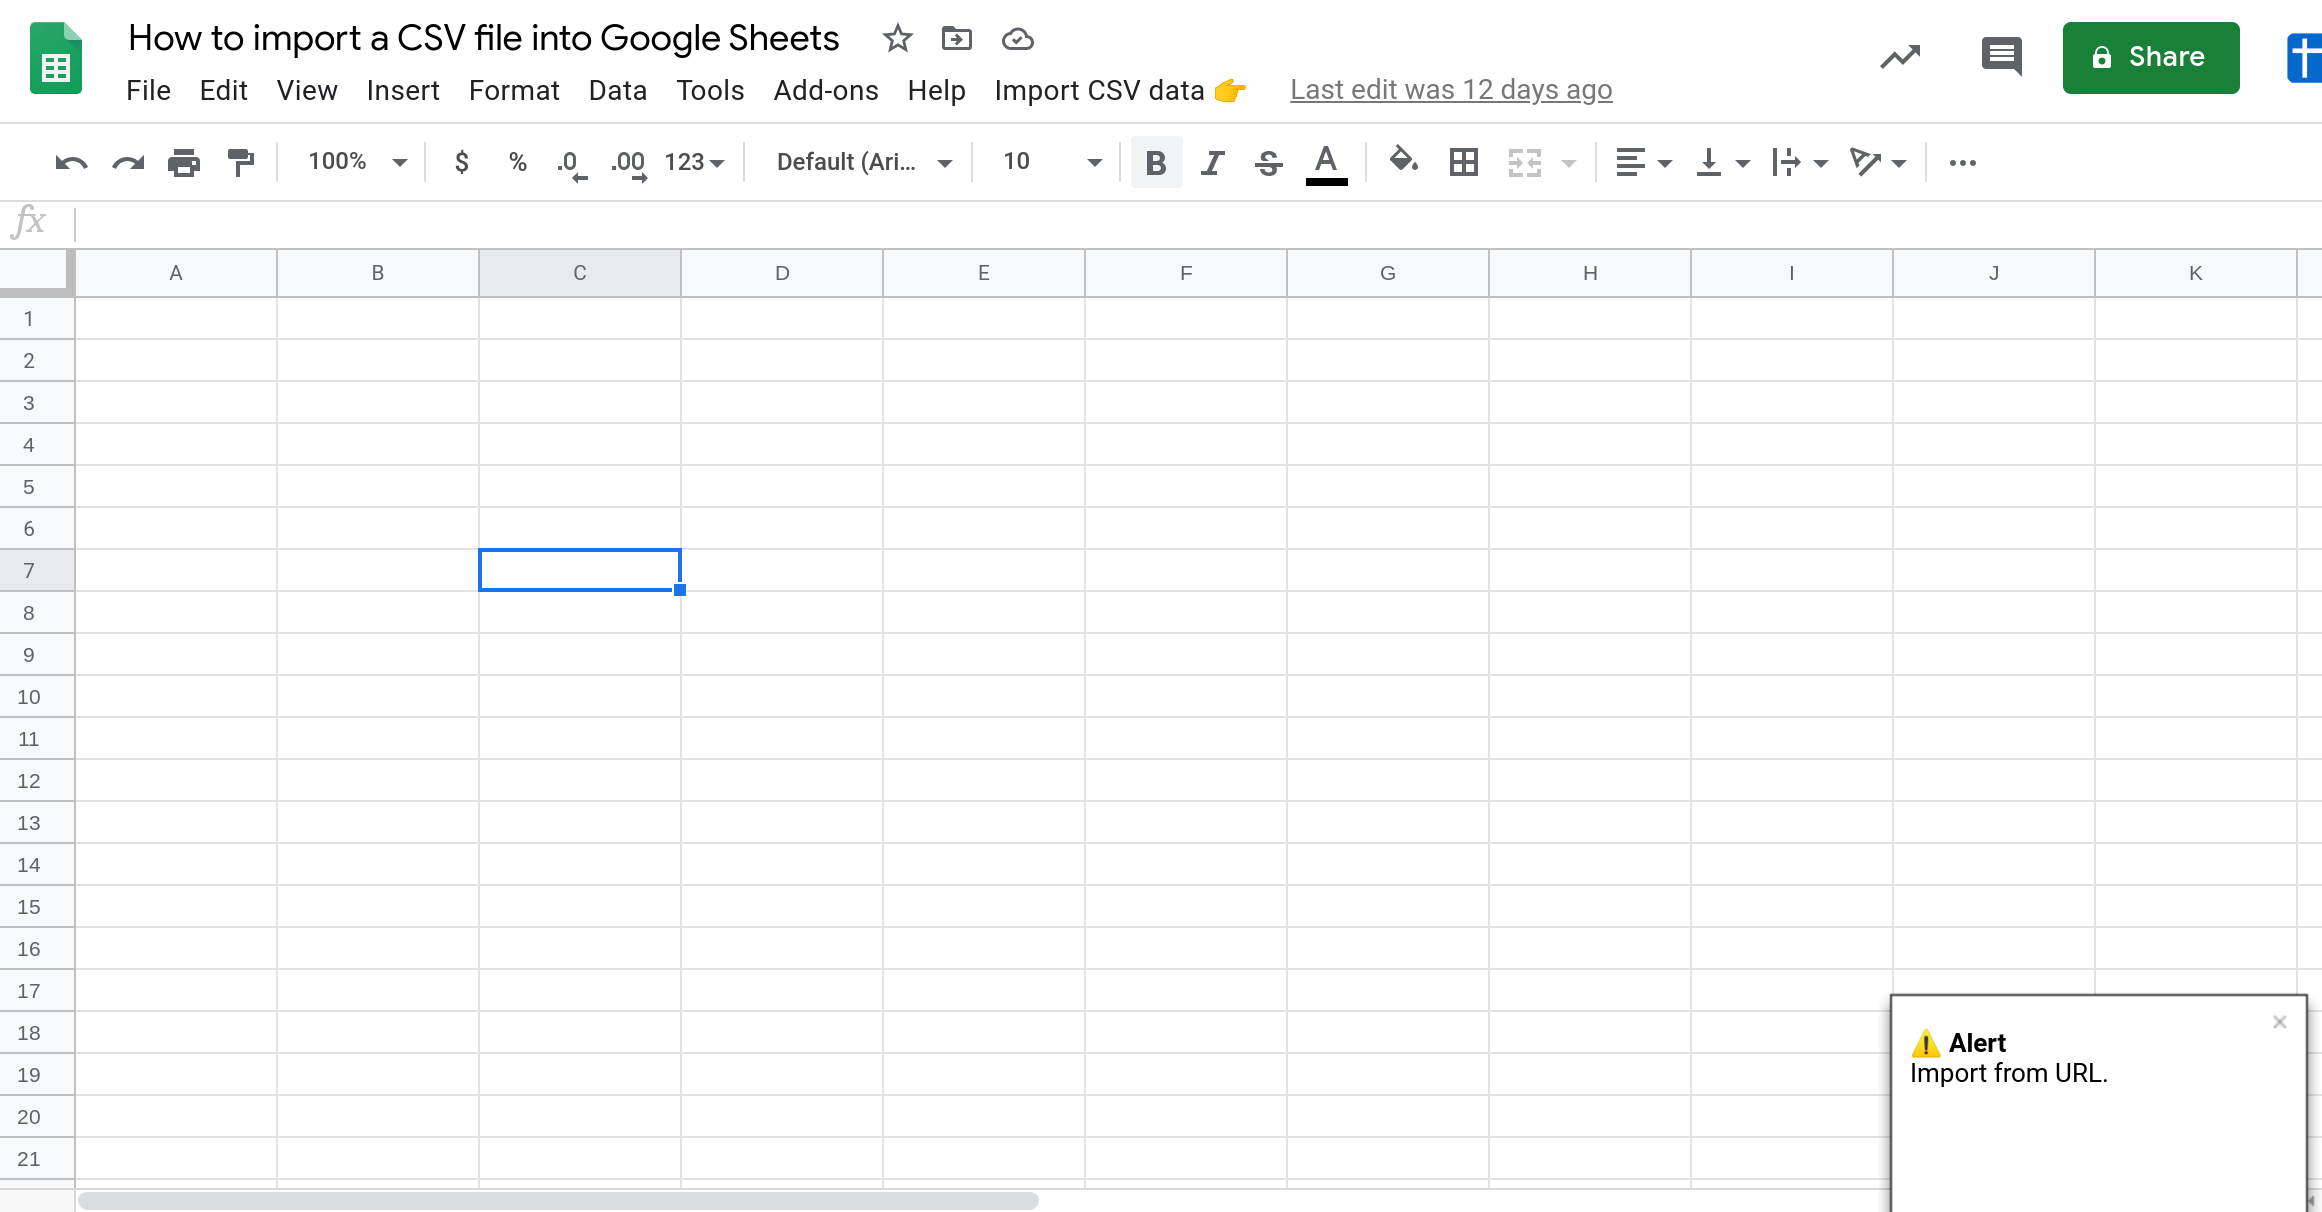
Step 3 — Prompt the user for the URL or Google Drive Filename of the CSV file
Next, we need to implement functionality to ask the user to specify which URL or file to import the CSV data from.
Note
Please see the tutorial on Getting user input in Google Sheets using prompts for more information about using prompts in Apps Script.
Create a new function called prompUserForInput() to prompt the user for input. It will accept the text to display in the prompt as a parameter and it will return the value entered by the user.
function promptUserForInput(promptText) {
  var ui = SpreadsheetApp.getUi();
  var prompt = ui.prompt(promptText);
  var response = prompt.getResponseText();
  return response;
}
Modify the functions importCSVFromUrl() and importCSVFromDrive() to use the prompUserForInput() function to get the URL or Filename from the user. Then, include this information in the alert message to help us verify that the user's input was received successfully.
function importCSVFromUrl() {
  var url = promptUserForInput("Please enter the URL of the CSV file:");
  displayToastAlert("Importing from URL: " + url);
}

function importCSVFromDrive() {
  var fileName = promptUserForInput("Please enter the name of the CSV file to import from Google Drive:");
  displayToastAlert("Importing from Drive: " + fileName);
}
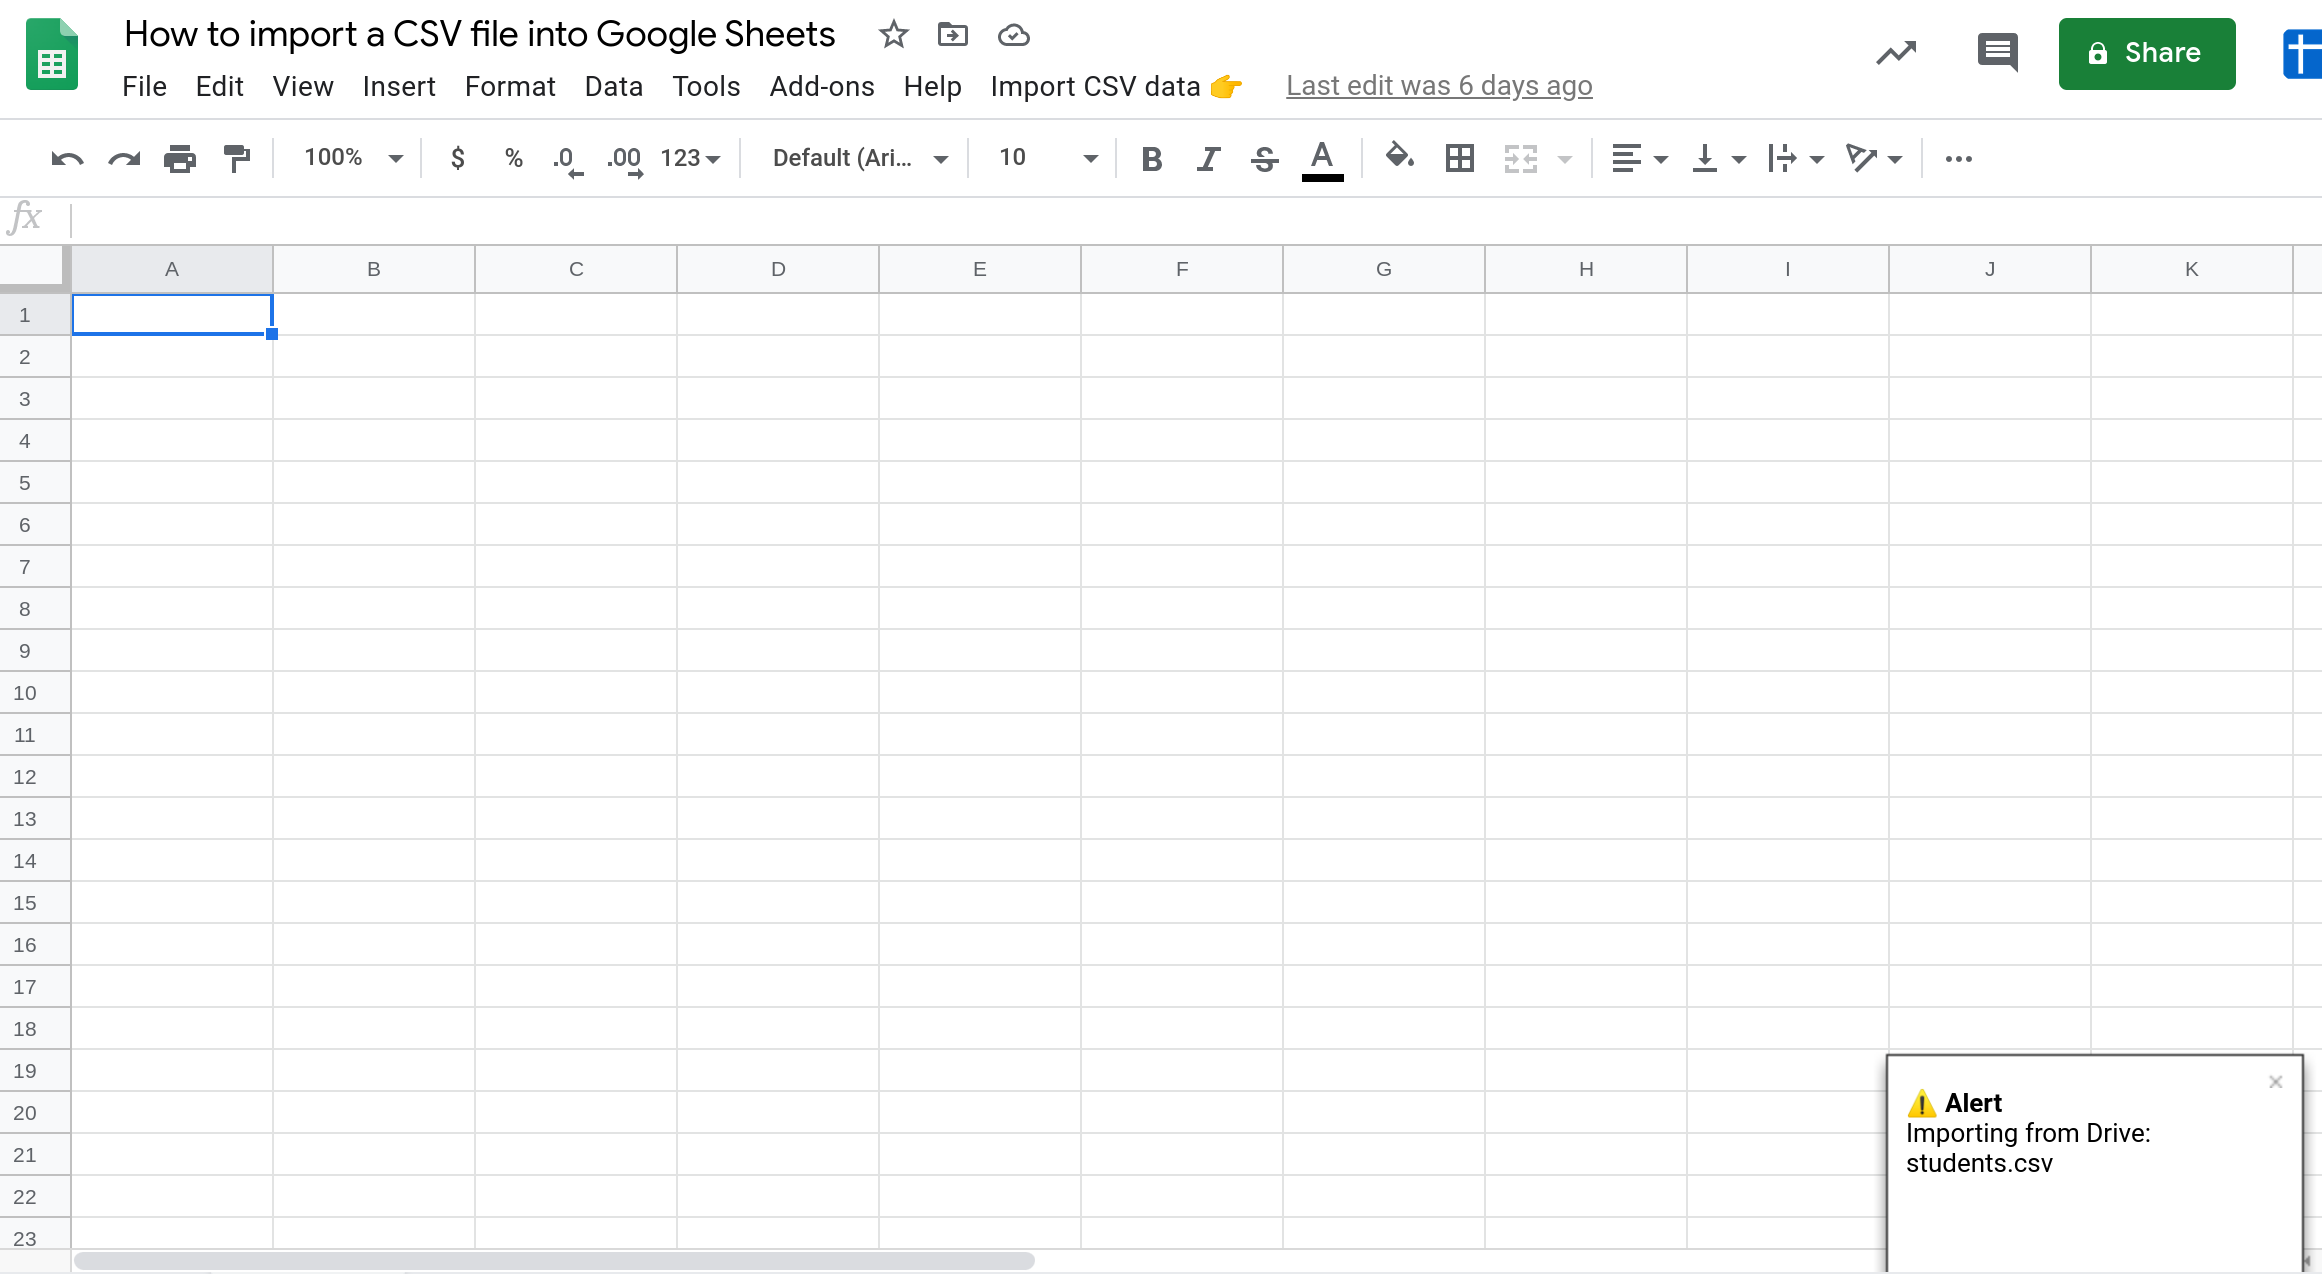
Test your changes by selecting "Import from Drive" from the menu.

You should see a prompt asking you to enter the name of the file to import.
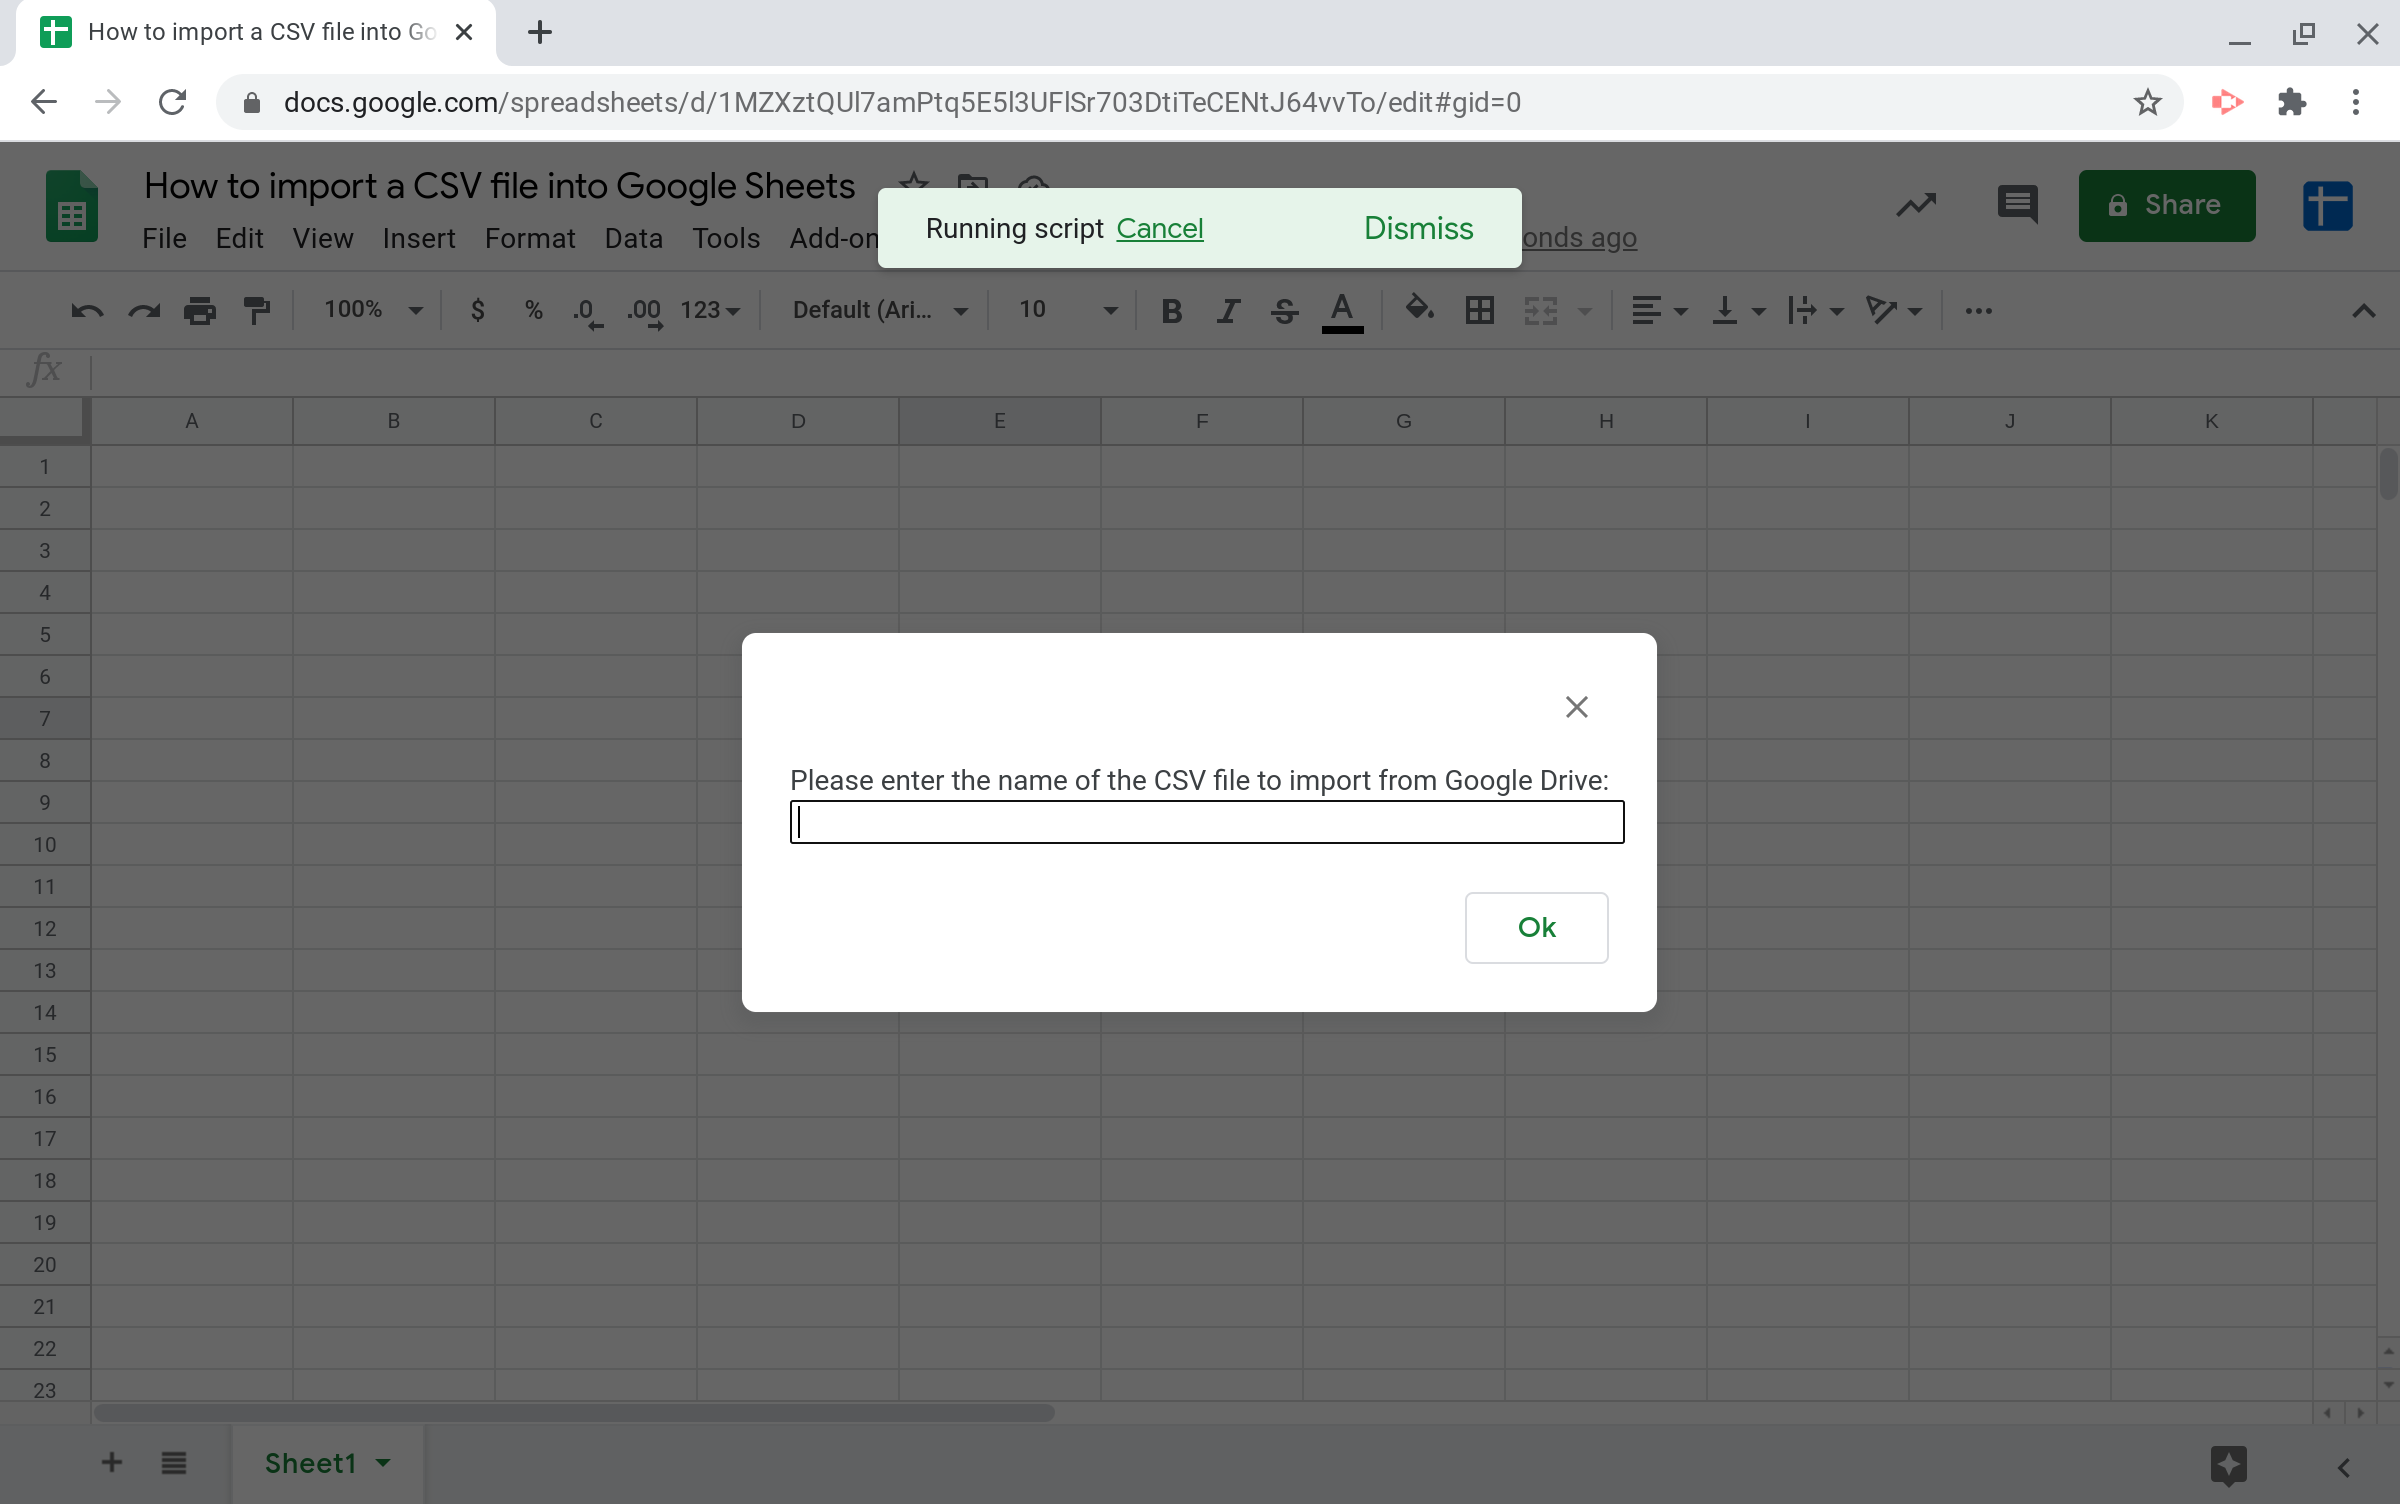
Enter the name of some CSV file and select [Ok]. The file doesn't have to exist in Google Drive (at least not yet), we're just testing to see if we can successfully receive input from the user.
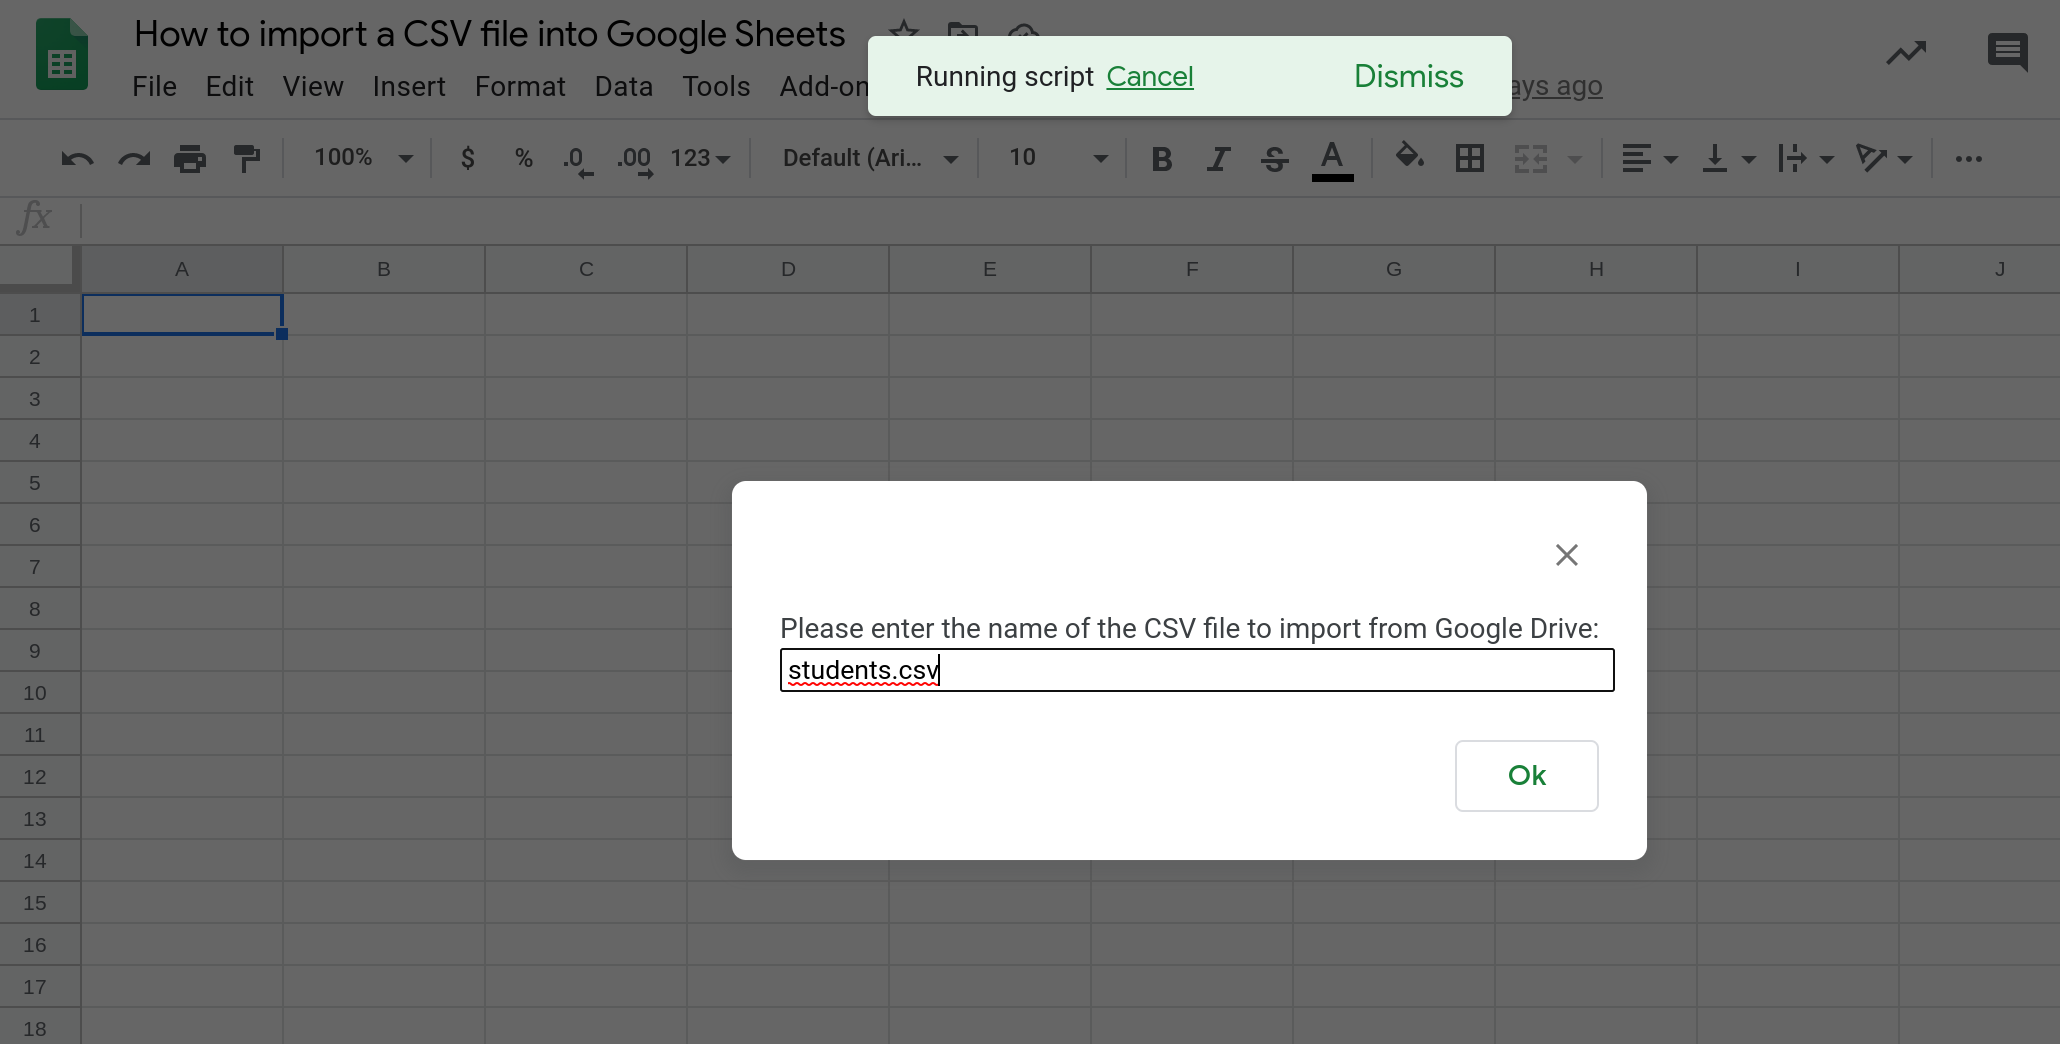
You should see the filename you entered displayed in the alert message.
Step 4 — Import the CSV file into a new sheet in spreadsheet
The next step is to write the code to actually import the contents of the CSV file into a new sheet in the spreadsheet.
Here is how our code will work:
First, we will write the code to access the CSV file from a URL or from Google Drive and load its contents into a variable as a string.
Then, we will convert the string into a 2D array whose rows and columns are populated with the data in the CSV file.
Finally, we will insert a new sheet in the Google Sheets spreadsheet and write this 2D array into it.
Display an alert message letting the user know that the CSV file has been imported successfully.
Step 4.1 — Write the code to access the CSV file from a URL or Google Drive and load its contents into a variable as a stringStep 4.1.1 — Accessing CSV files from a URL
Get the URL of the CSV file from the user.
Fetch its contents by using the
UrlFetchApp.fetch()method.Display the contents using the
displayToastAlert()function so you can see if it worked.
function importCSVFromUrl() {
  var url = promptUserForInput("Please enter the URL of the CSV file:");
  var contents = UrlFetchApp.fetch(url);
  displayToastAlert(contents);
}
Save your script, open your Google Sheet and select the "Import from URL" item from the menu and enter the URL of a CSV file.

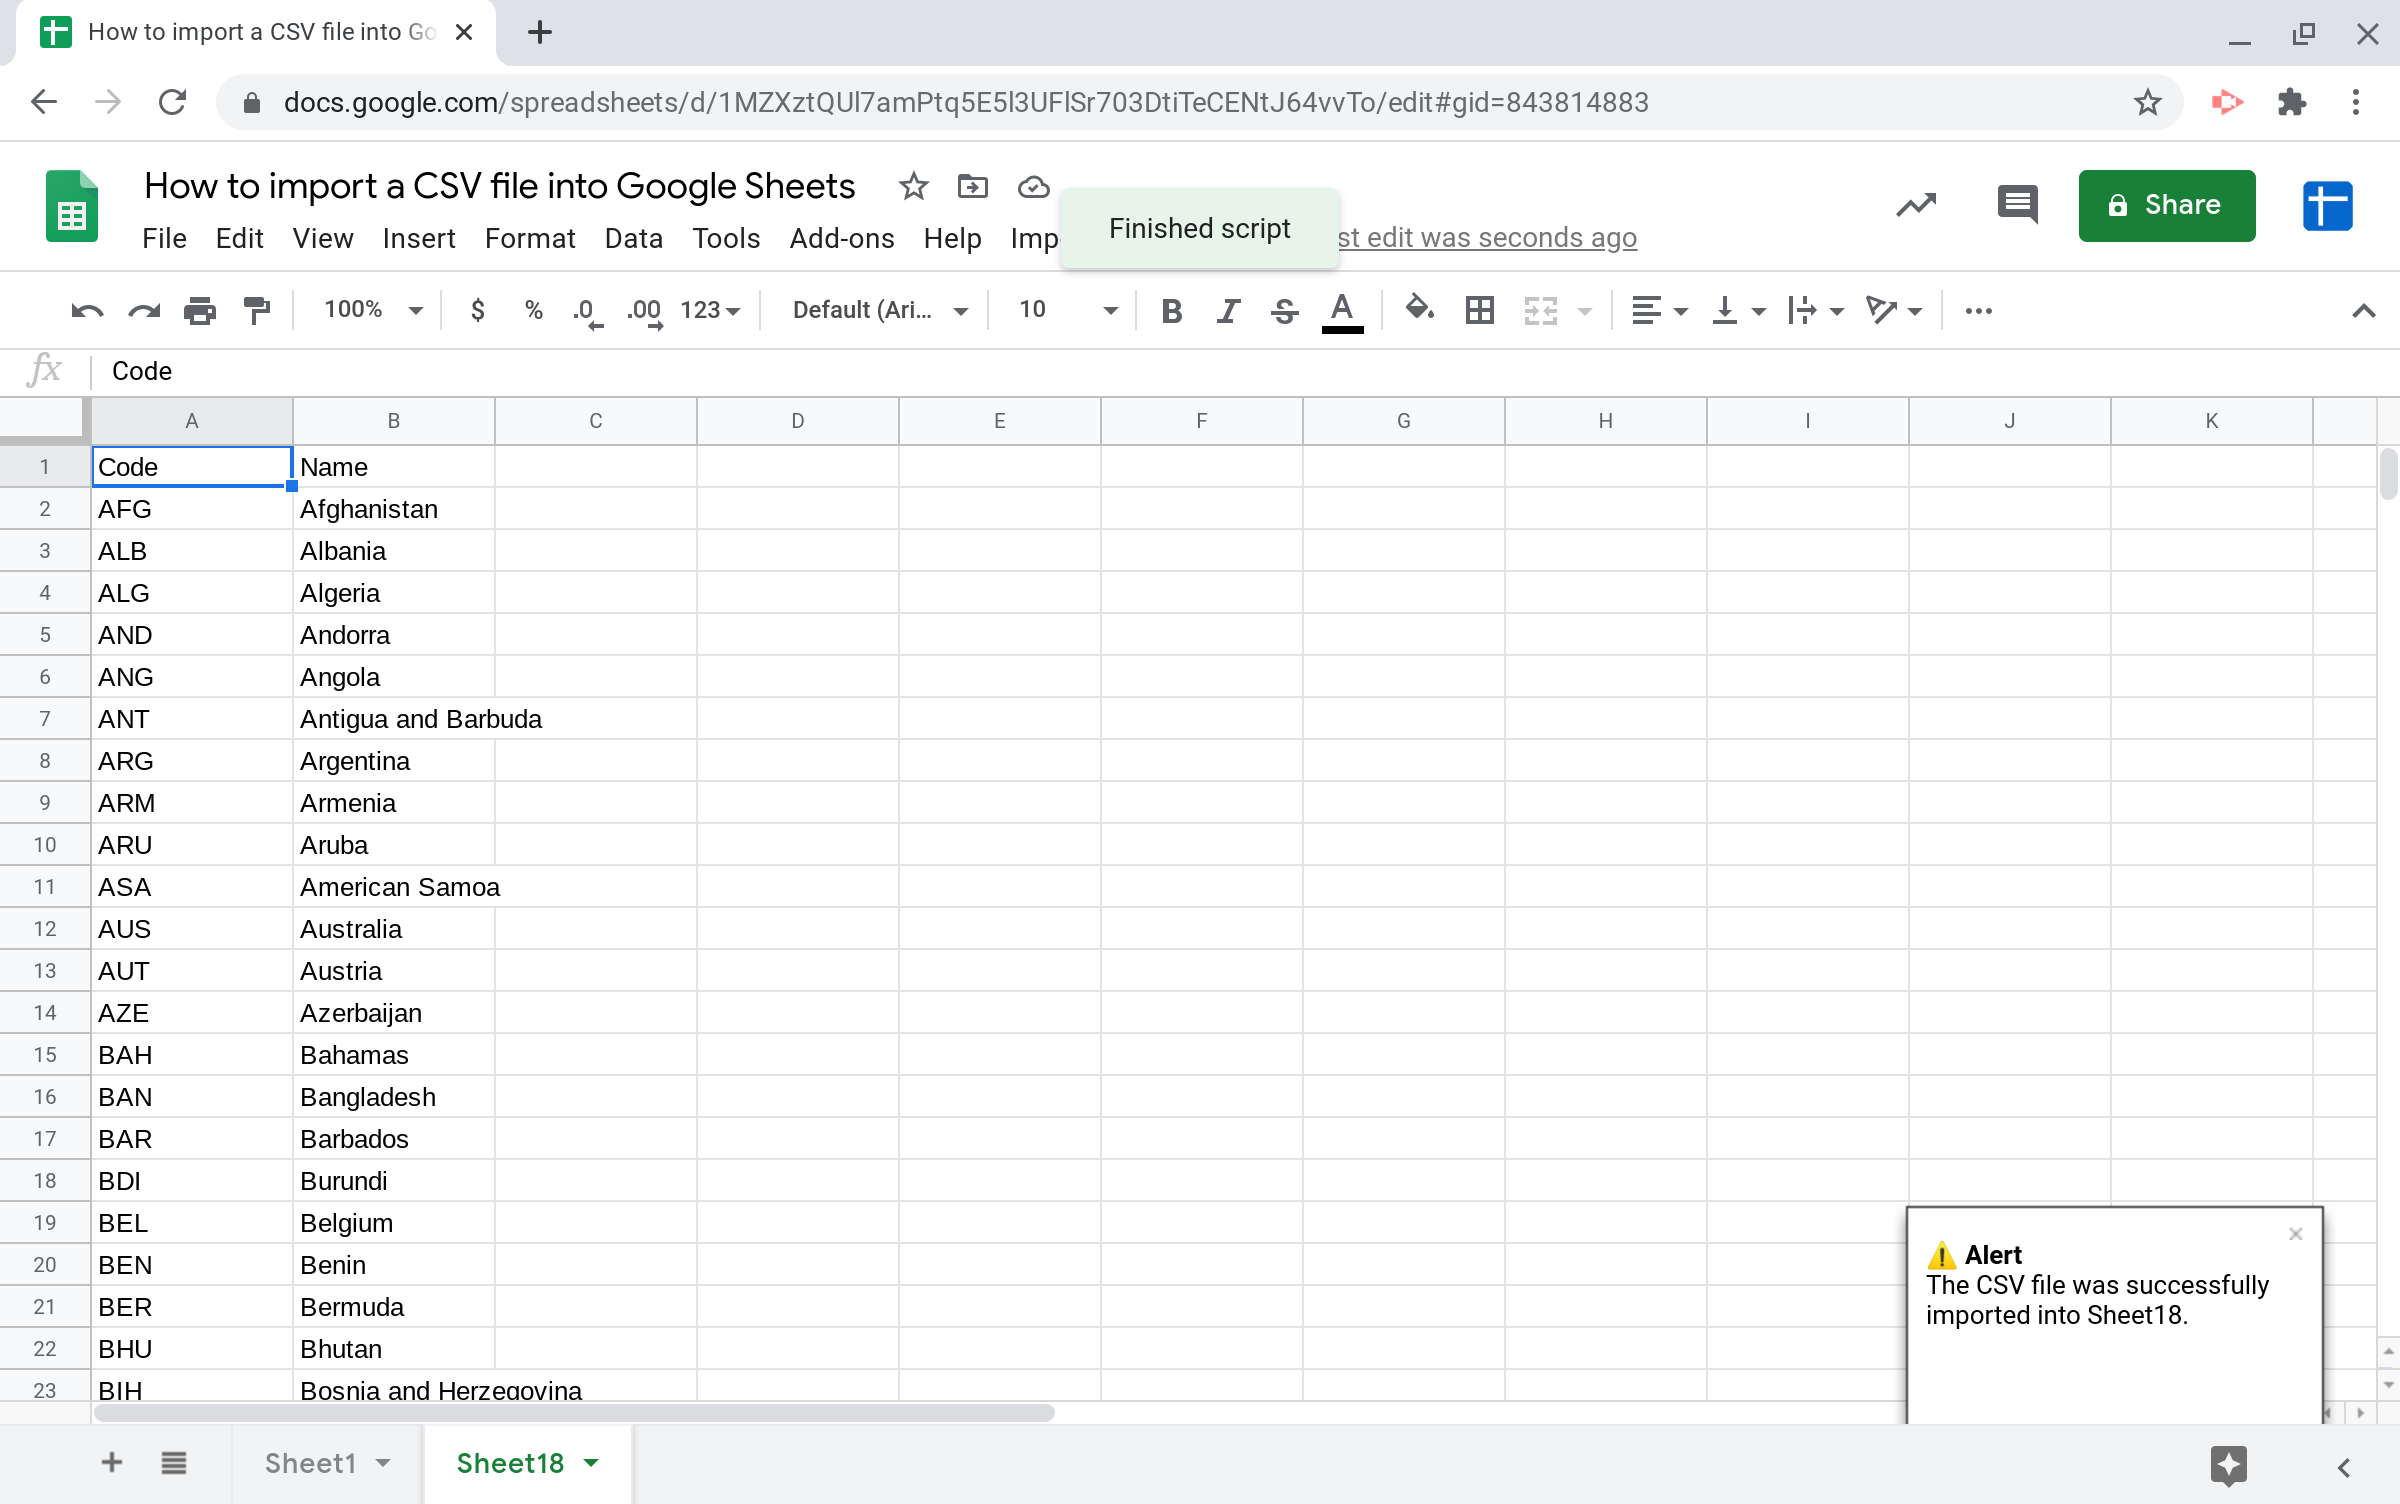
I tested the script using the CSV file containing a list of country codes and names at this URL: https://raw.githubusercontent.com/openmundi/world.csv/master/countries(204)_olympics.csv
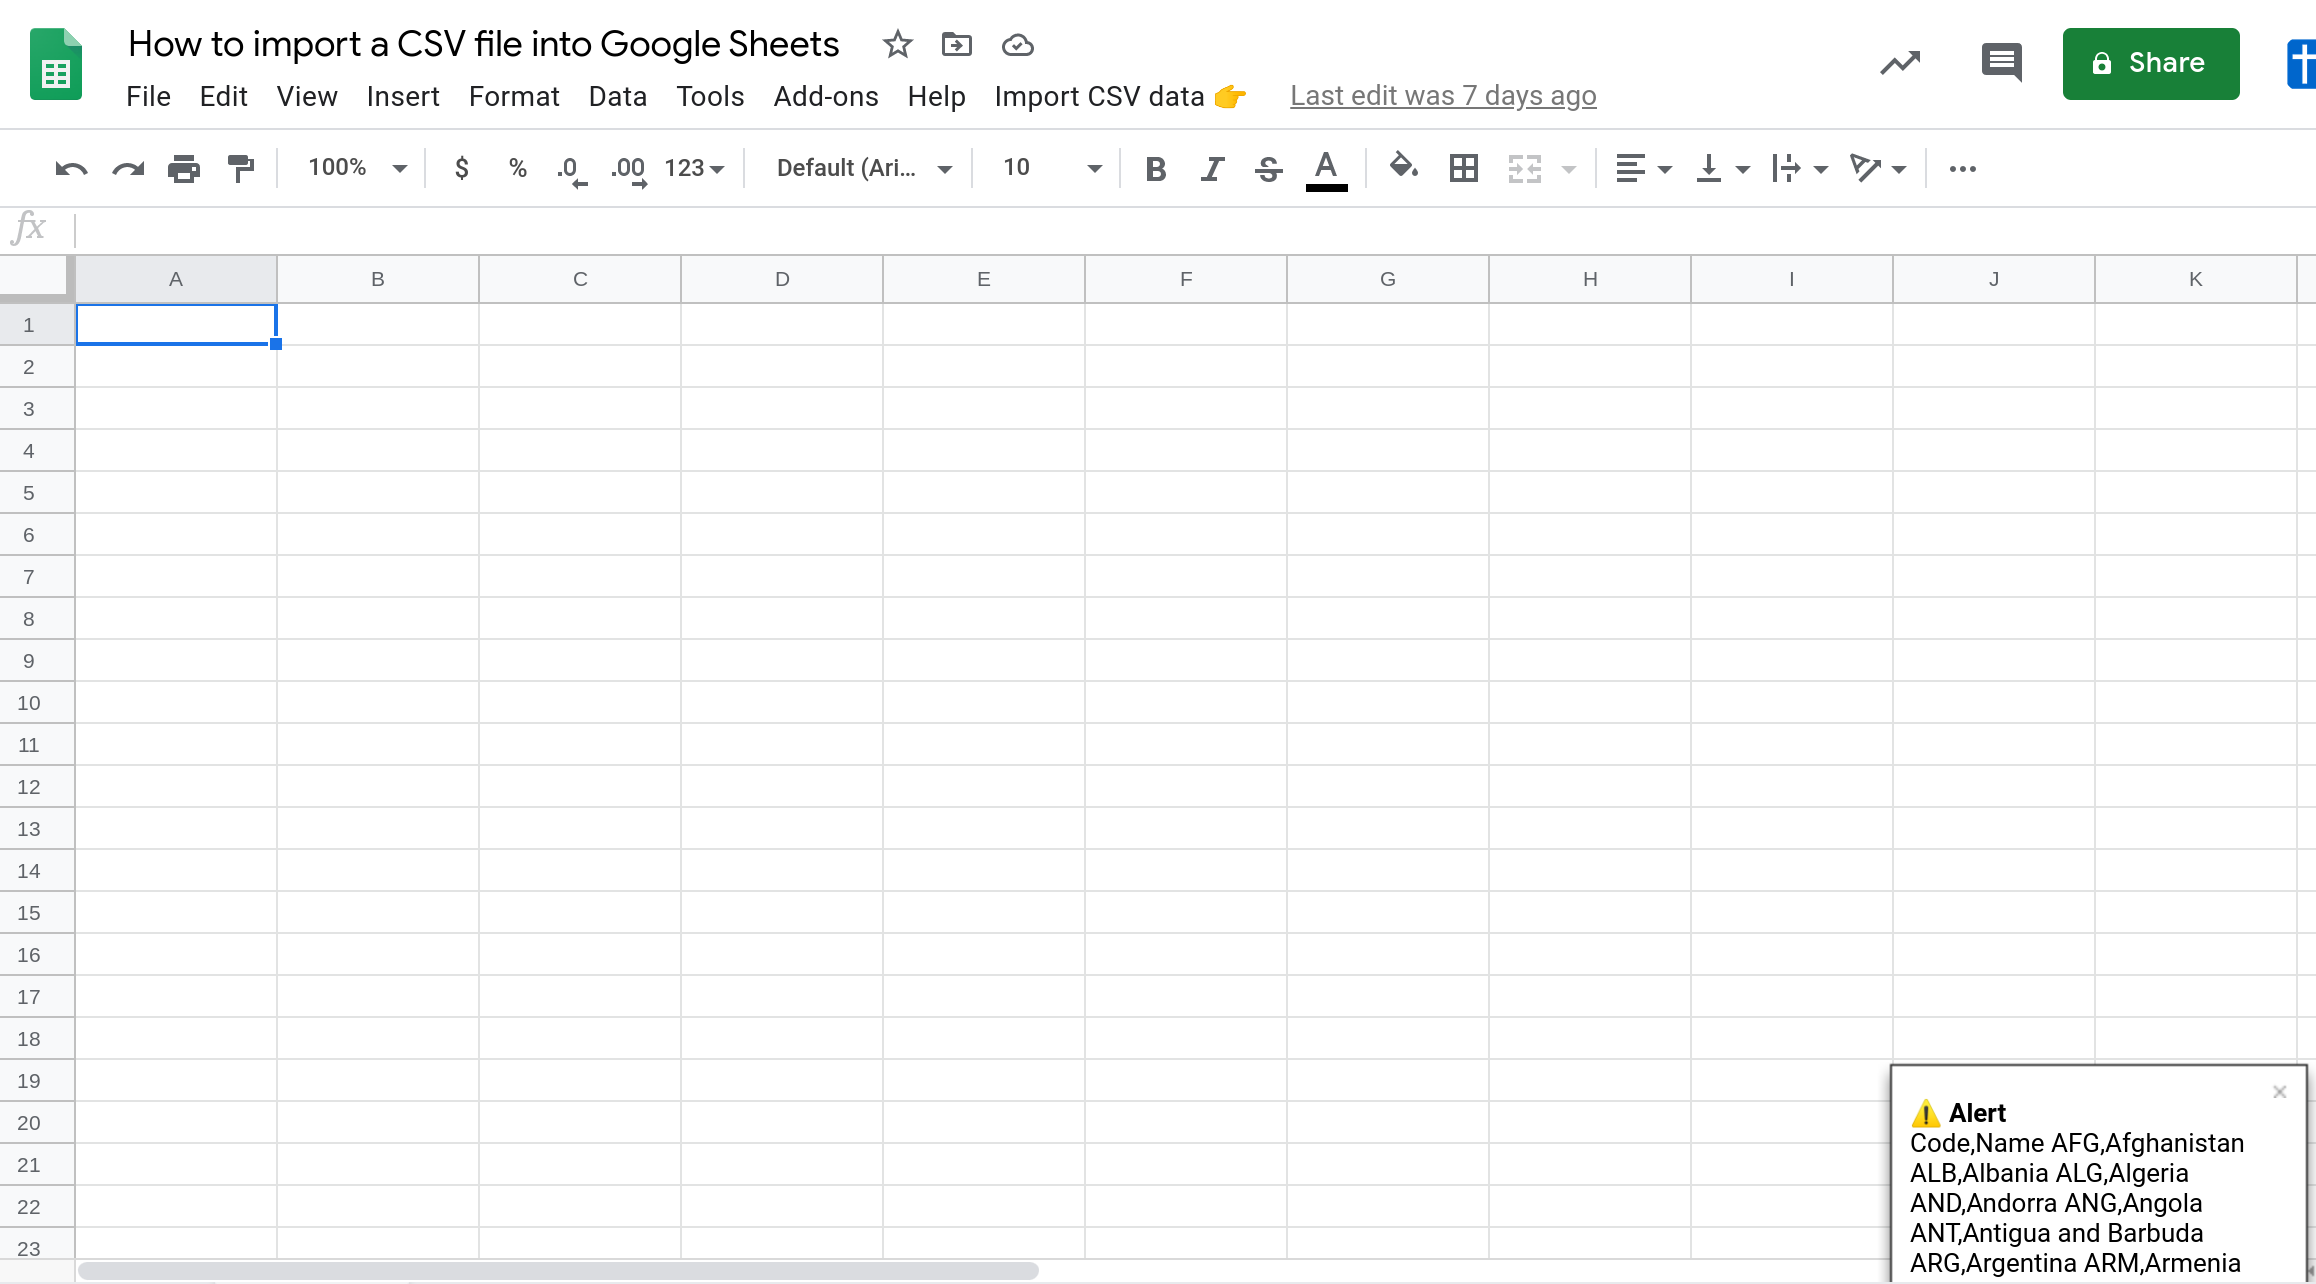
When the script finishes running, you should see the contents of the CSV file displayed in the Toast notification message.
Step 4.1.2 — Accessing CSV files from Google DriveGet the name of the CSV file from the user.
Search Google Drive to find files with this name.
If the file is not found, display an error message to the user to let them know that the file was not found.
If multiple files are found, display an error message to the user to let them know that the script does not yet support letting them choose the right file to import.
Fetch the file's contents and display it using the displayToastAlert() function so you can see if it worked.
Note
The findFilesInDrive() function in the code below accepts the name of a file as input and returns an array of files in Google Drive having this name. If no files are found, an empty array is returned and its length will be 0. If multiple files are found, the length of the array will be > 1. The importCSVFromDrive() function uses this length property to alert the user if no files are found or if multiple files are found.
function importCSVFromDrive() {
  var fileName = promptUserForInput("Please enter the name of the CSV file to import from Google Drive:");
  var files = findFilesInDrive(fileName);
  if(files.length === 0) {
    displayToastAlert("No files with name \"" + fileName + "\" were found in Google Drive.");
    return;
  } else if(files.length > 1) {
    displayToastAlert("Multiple files with name " + fileName +" were found. This program does not support picking the right file yet.");
    return;
  }
  var file = files[0];
  var contents = file.getBlob().getDataAsString();
  displayToastAlert(contents);
}

//Returns files in Google Drive that have a certain name.
function findFilesInDrive(filename) {
  var files = DriveApp.getFilesByName(filename);
  var result = [];
  while(files.hasNext())
    result.push(files.next());
  return result;
}
Get the name of the CSV file from the user.
Search Google Drive to find files with this name.
If the file is not found, display an error message to the user to let them know that the file was not found.
If multiple files are found, display an error message to the user to let them know that the script does not yet support letting them choose the right file to import.
Fetch the file's contents and display it using the displayToastAlert() function so you can see if it worked.
Note
The findFilesInDrive() function in the code below accepts the name of a file as input and returns an array of files in Google Drive having this name. If no files are found, an empty array is returned and its length will be 0. If multiple files are found, the length of the array will be > 1. The importCSVFromDrive() function uses this length property to alert the user if no files are found or if multiple files are found.
function importCSVFromDrive() {
var fileName = promptUserForInput("Please enter the name of the CSV file to import from Google Drive:");
var files = findFilesInDrive(fileName);
if(files.length === 0) {
displayToastAlert("No files with name \"" + fileName + "\" were found in Google Drive.");
return;
} else if(files.length > 1) {
displayToastAlert("Multiple files with name " + fileName +" were found. This program does not support picking the right file yet.");
return;
}
var file = files[0];
var contents = file.getBlob().getDataAsString();
displayToastAlert(contents);
}
//Returns files in Google Drive that have a certain name.
function findFilesInDrive(filename) {
var files = DriveApp.getFilesByName(filename);
var result = [];
while(files.hasNext())
result.push(files.next());
return result;
}Let's say the CSV file in Google Drive is students.csv and it has the following contents:
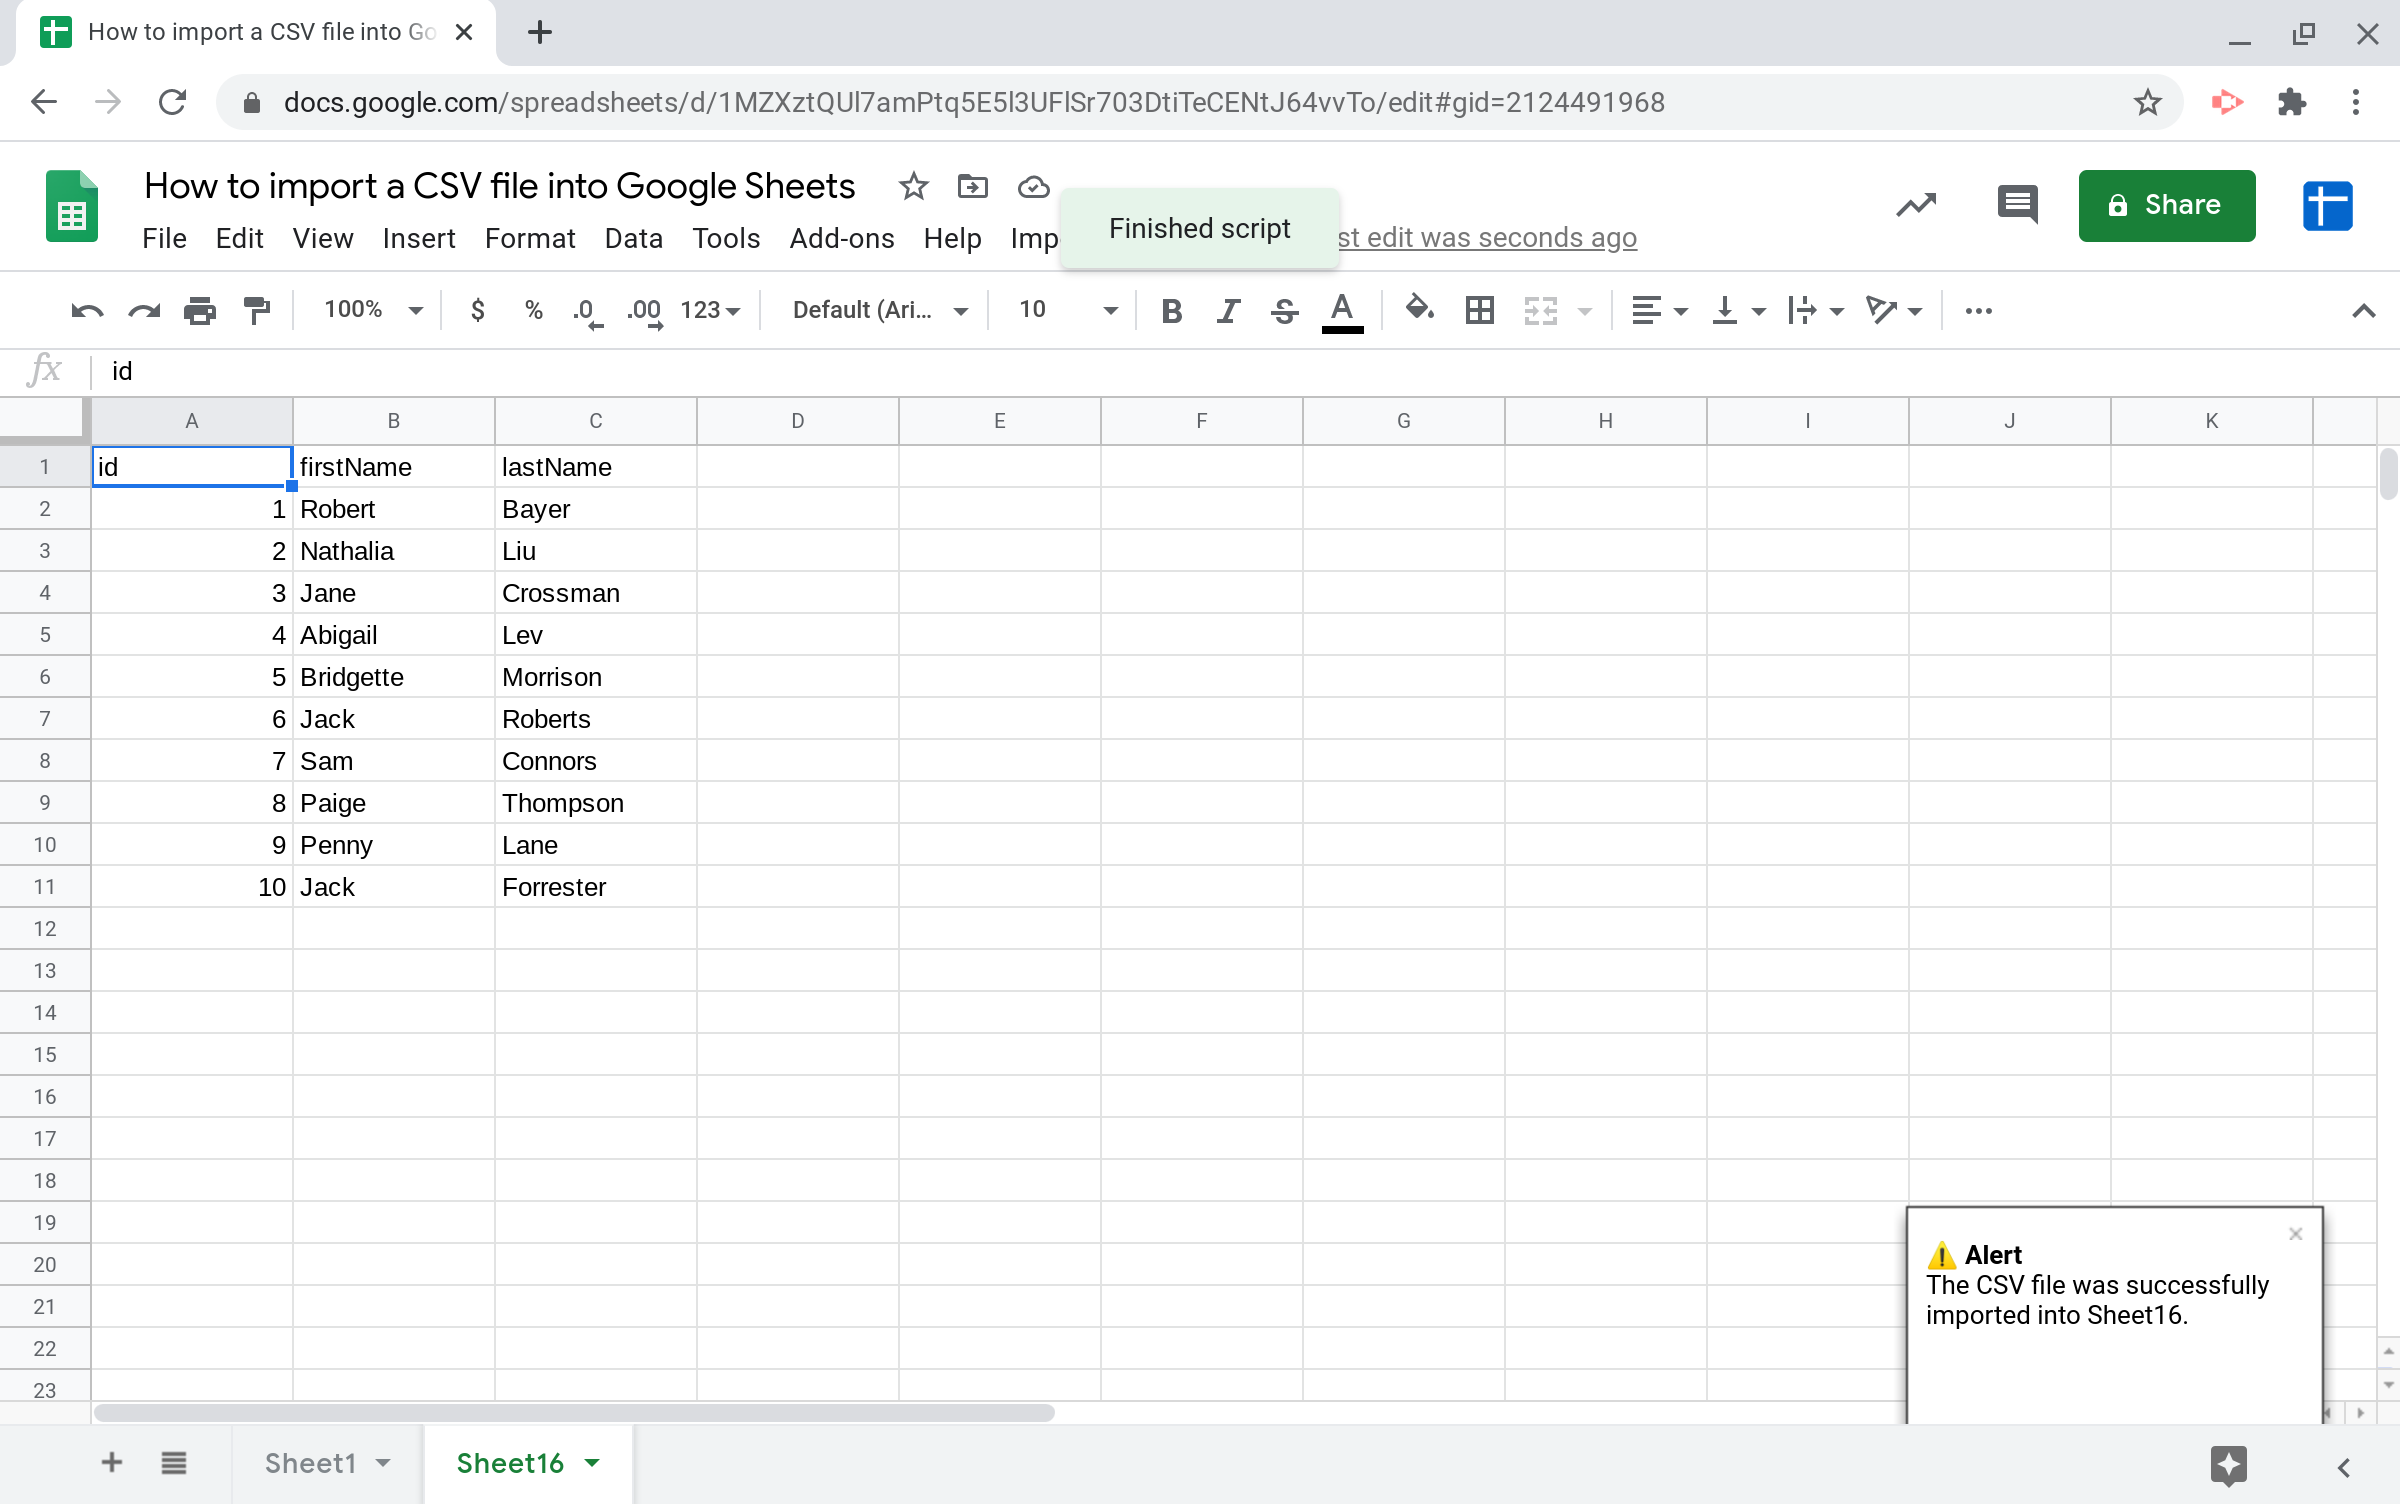
id,firstName,lastName
1,Robert,Bayer
2,Nathalia,Liu
3,Jane,Crossman
4,Abigail,Lev
5,Bridgette,Morrison
6,Jack,Roberts
7,Sam,Connors
8,Paige,Thompson
9,Penny,Lane
10,Jack,Forrester
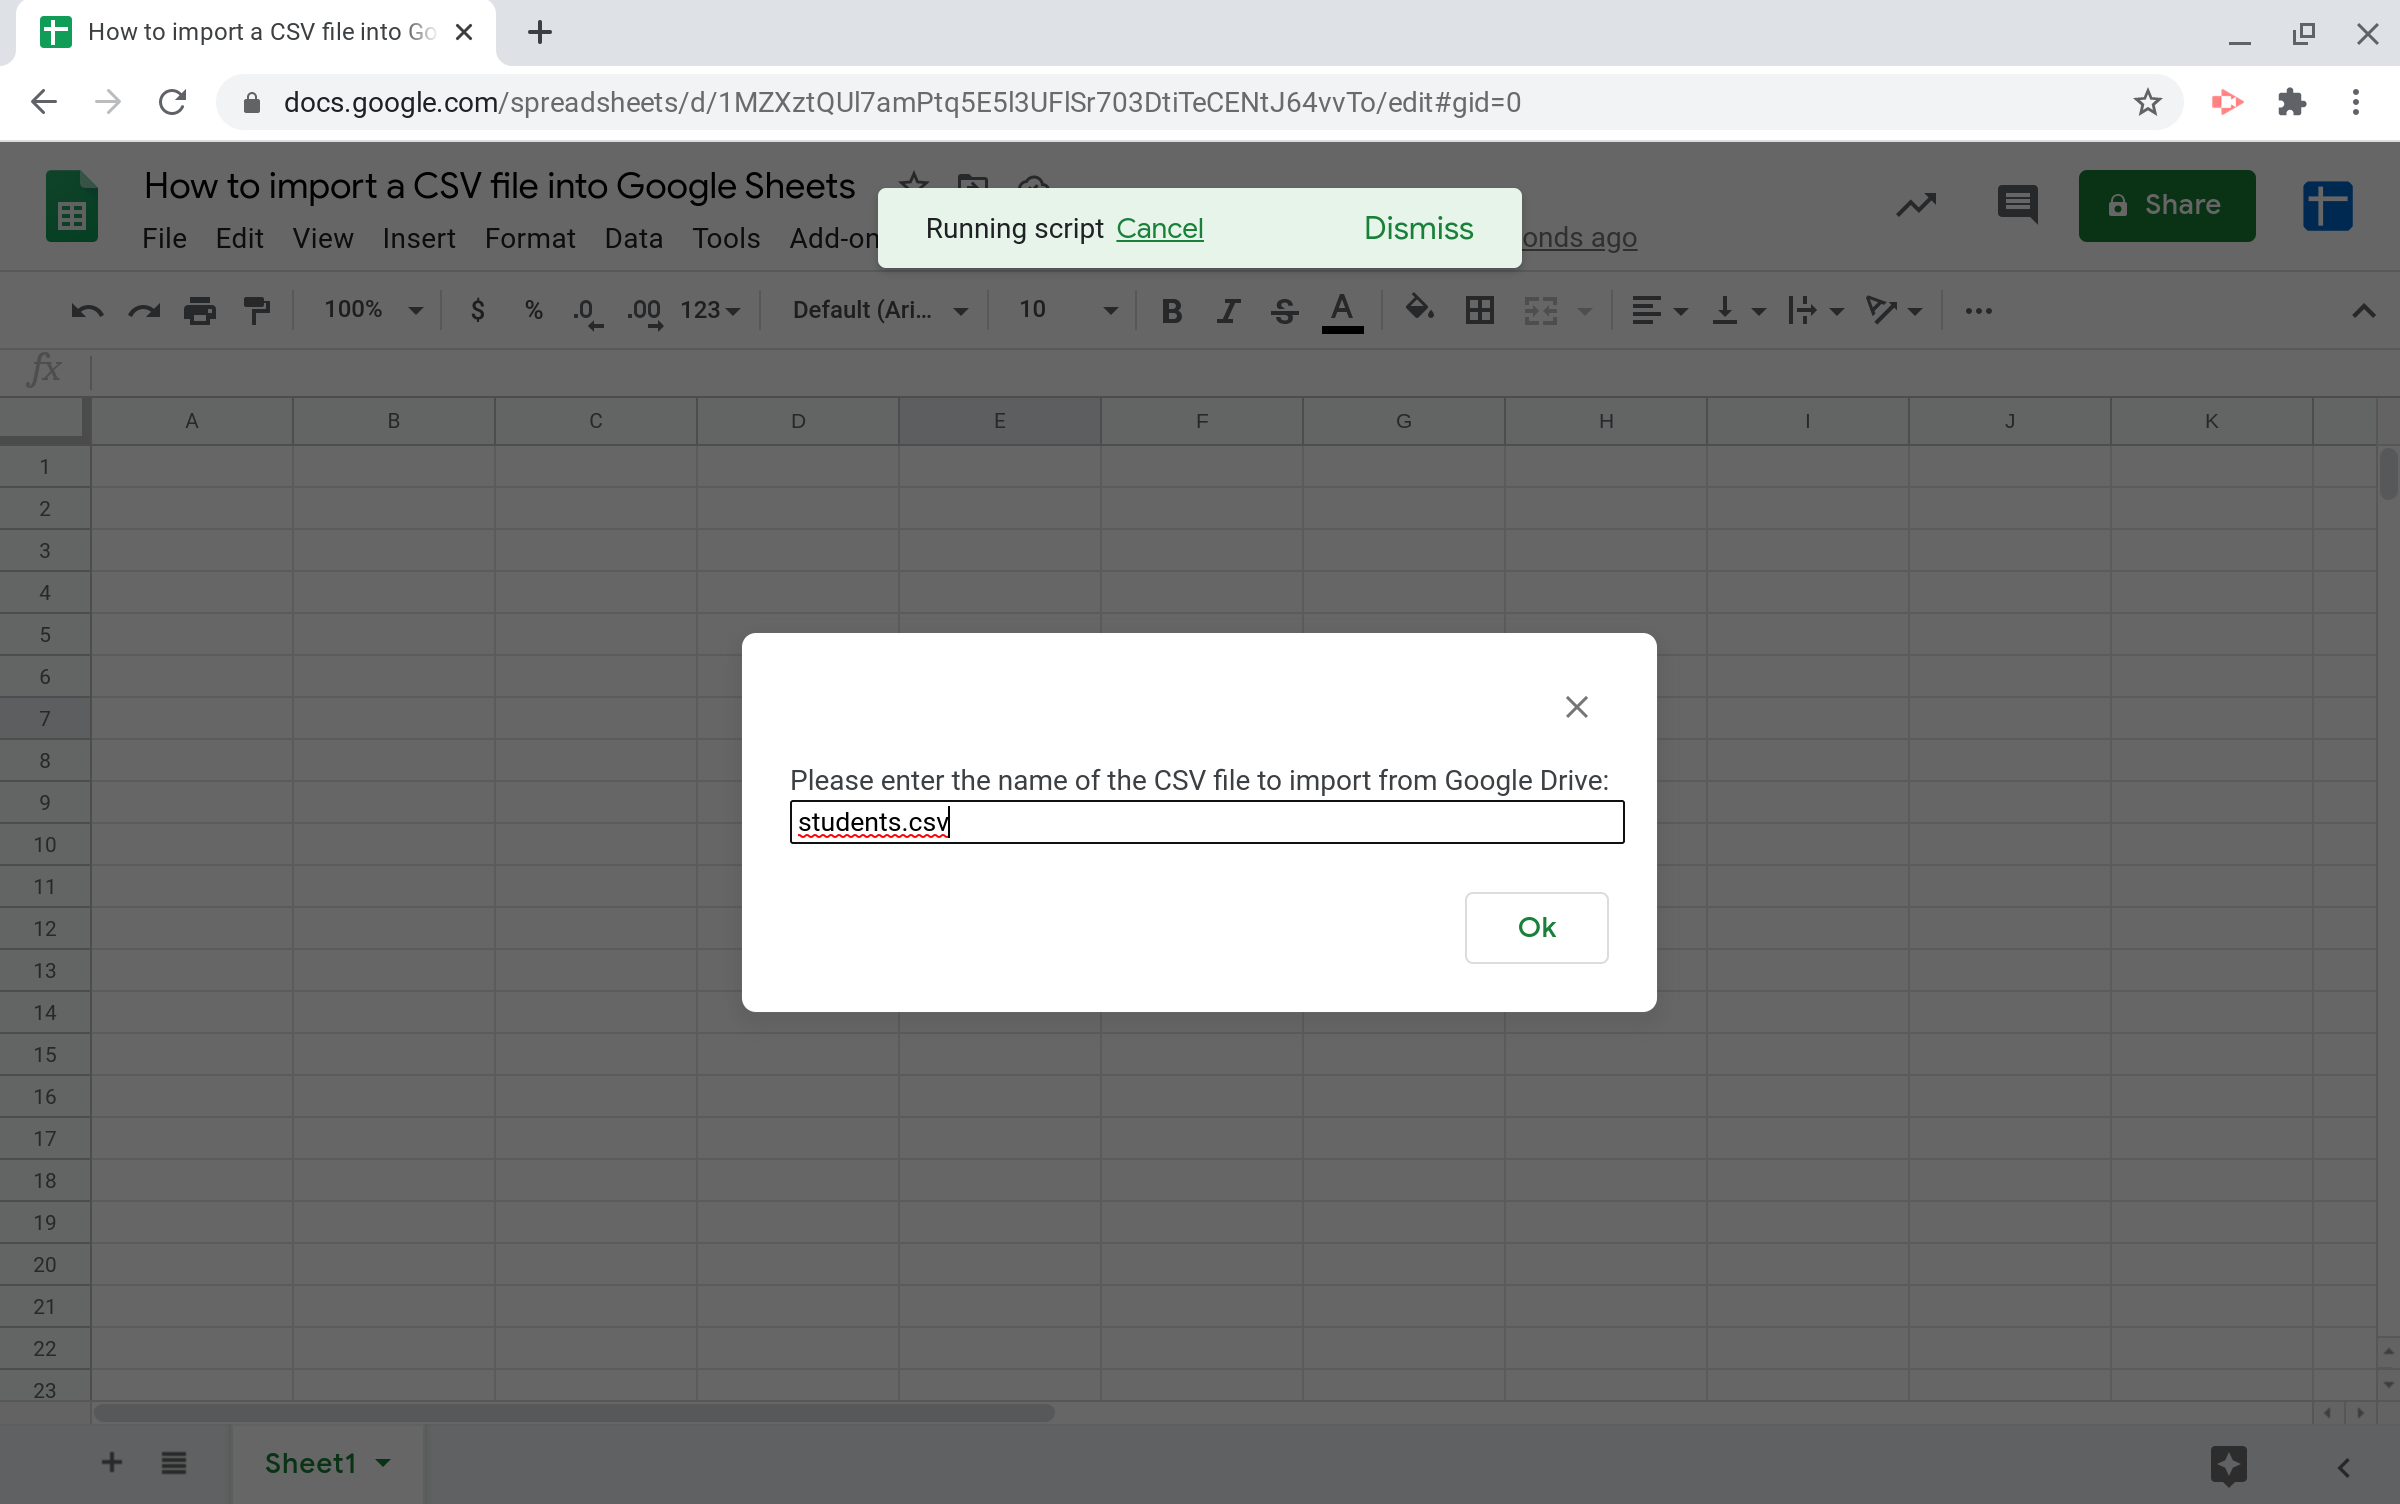
To test the code, select "Import from Google Drive"

Enter the name of the CSV file (students.csv in my case) and select [Ok].
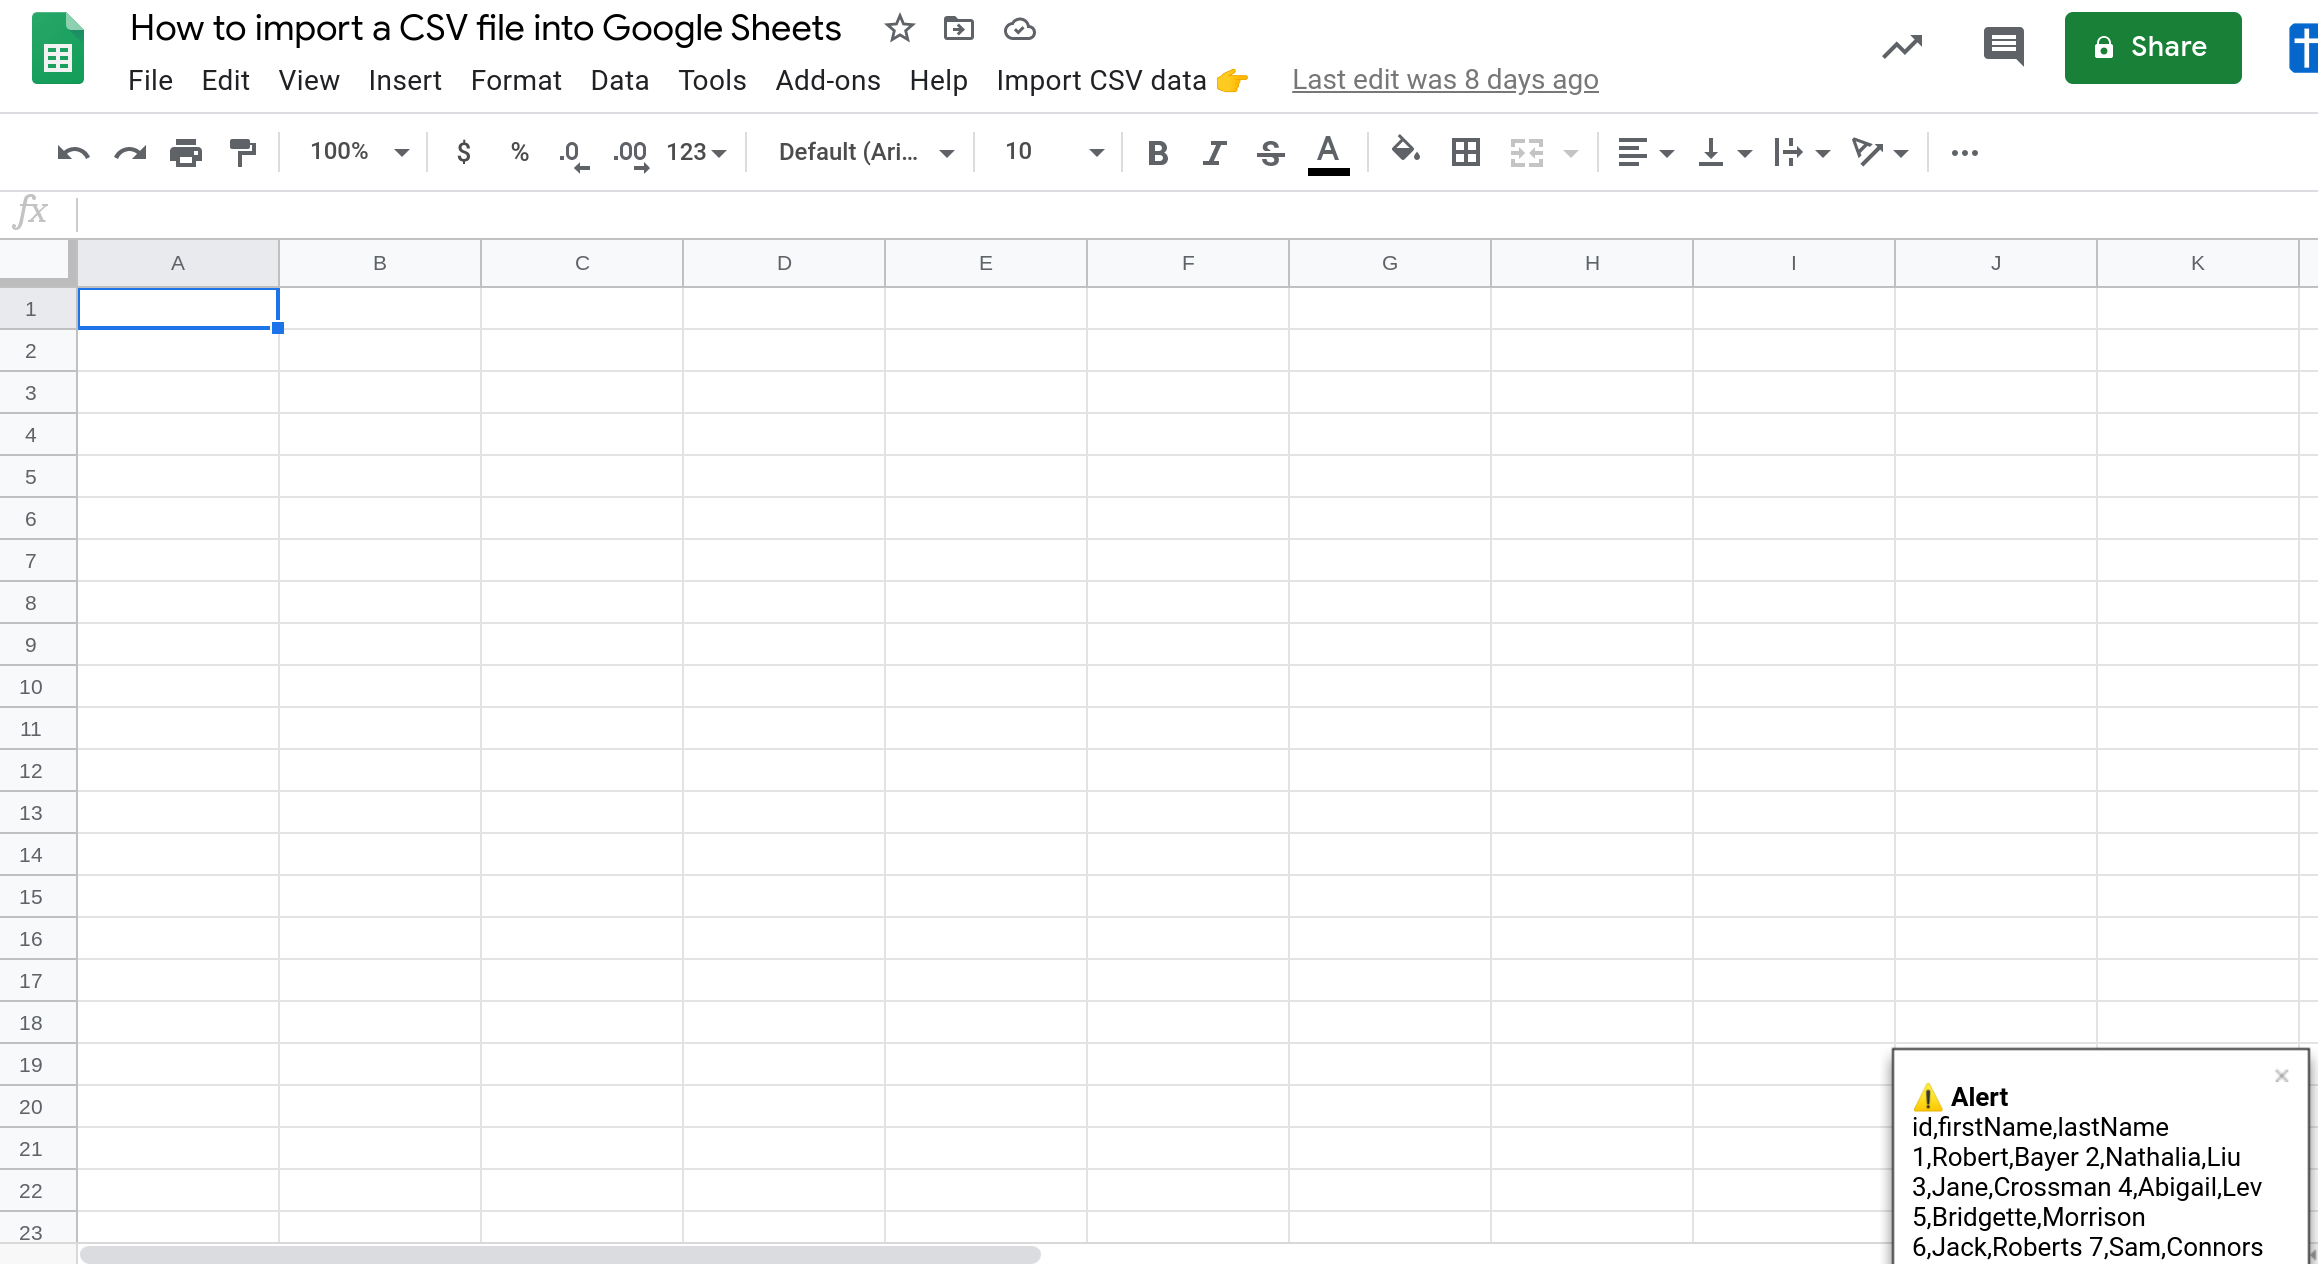
The script will run and when it finishes running, you should see the CSV file's contents displayed in the toast message.
So far, our script can access CSV files from a URL or from Google Drive and access its contents. The next step is to convert this data into a 2D array (i.e., into rows and columns) so the data can be written to the spreadsheet.
Step 4.3 — Convert the string into two-dimensional (2D) array
In order to write the CSV data into the spreadsheet, we need to convert the string to a two-dimensional array. That is, we need to parse the string and convert its contents into tabular form.
The method parseCsv() in the Apps Script's Utilities library converts a string containing CSV data into a two-dimensional array.
Utilities.parseCsv(data);The table below shows an example of the two-dimensional array data structure returned by the parseCsv() method.
String containing CSV data | 2D array representation of CSV data |
|---|---|
id,firstName,lastName 1,Robert,Bayer 2,Nathalia,Liu | [ ["id","firstName","lastName"], ["1","Robert", "Bayer"], ["2","Nathalia","Liu"] ] |
Step 4.3.1 — Use the parseCsv() method in the importCSVFromDrive() functionfunction importCSVFromDrive() {
var fileName = promptUserForInput("Please enter the name of the CSV file to import from Google Drive:");
var files = findFilesInDrive(fileName);
if(files.length === 0) {
displayToastAlert("No files with name \"" + fileName + "\" were found in Google Drive.");
return;
} else if(files.length > 1) {
displayToastAlert("Multiple files with name " + fileName +" were found. This program does not support picking the right file yet.");
return;
}
var file = files[0];
var contents = Utilities.parseCsv(file.getBlob().getDataAsString());
displayToastAlert(contents);
}
Step 4.3.2 — Use the parseCsv() method in the importCSVFromUrl() functionfunction importCSVFromUrl() {
var url = promptUserForInput("Please enter the URL of the CSV file:");
var contents = Utilities.parseCsv(UrlFetchApp.fetch(url));
displayToastAlert(contents);
}
Step 4.4 — Insert a new sheet, write the 2D array into it and let the user know that the CSV file has been imported successfully
function importCSVFromDrive() {
  var fileName = promptUserForInput("Please enter the name of the CSV file to import from Google Drive:");
  var files = findFilesInDrive(fileName);
  if(files.length === 0) {
    displayToastAlert("No files with name \"" + fileName + "\" were found in Google Drive.");
    return;
  } else if(files.length > 1) {
    displayToastAlert("Multiple files with name " + fileName +" were found. This program does not support picking the right file yet.");
    return;
  }
  var file = files[0];
  var contents = Utilities.parseCsv(file.getBlob().getDataAsString());
  displayToastAlert(contents);
}function importCSVFromUrl() {
var url = promptUserForInput("Please enter the URL of the CSV file:");
var contents = Utilities.parseCsv(UrlFetchApp.fetch(url));
displayToastAlert(contents);
}Step 4.4 — Insert a new sheet, write the 2D array into it and let the user know that the CSV file has been imported successfully
The final step is to write the 2D array containing rows and columns from the CSV file to the spreadsheet. We'll create a new function called writeDataToSheet() that accepts the 2D array as input and writes it to a new sheet in the spreadsheet.
function writeDataToSheet(data) {
  var ss = SpreadsheetApp.getActive();
  sheet = ss.insertSheet();
  sheet.getRange(1, 1, data.length, data[0].length).setValues(data);
  return sheet.getName();
}
Step 4.4.1 — Write CSV data to the sheet from the importCSVFromDrive() function
Modify the importCSVFromDrive() function to write the 2D array in the variable contents to the spreadsheet using the writeDataToSheet() function. Then, modify the notification message to let the user know that the CSV file has been imported successfully.
function importCSVFromDrive() {
  var fileName = promptUserForInput("Please enter the name of the CSV file to import from Google Drive:");
  var files = findFilesInDrive(fileName);
  if(files.length === 0) {
    displayToastAlert("No files with name \"" + fileName + "\" were found in Google Drive.");
    return;
  } else if(files.length > 1) {
    displayToastAlert("Multiple files with name " + fileName +" were found. This program does not support picking the right file yet.");
    return;
  }
  var file = files[0];
  var contents = Utilities.parseCsv(file.getBlob().getDataAsString());
  var sheetName = writeDataToSheet(contents);
  displayToastAlert("The CSV file was successfully imported into " + sheetName + ".");
}
Now try importing a CSV file from Google Drive. Your script will insert a new sheet in your spreadsheet with the contents of the CSV file.
Step 4.4.2 — Write CSV data to the sheet from the importCSVFromUrl() function
Modify the importCSVFromUrl() function to write the 2D array in the variable contents to the spreadsheet using the writeDataToSheet() function. Then, modify the notification message to let the user know that the CSV file has been imported successfully.
function importCSVFromUrl() {
  var url = promptUserForInput("Please enter the URL of the CSV file:");
  var contents = Utilities.parseCsv(UrlFetchApp.fetch(url));
  var sheetName = writeDataToSheet(contents);
  displayToastAlert("The CSV file was successfully imported into " + sheetName + ".");
}
Now try importing a CSV file from a URL. Your script will insert a new sheet in your spreadsheet with the contents of the CSV file.
That's it! You've successfully written a script to import CSV files from a URL or from Google Drive.
The full script to import CSV files into Google Sheets using Apps Script
If you've been following the steps in this tutorial, your final script should look like this:
//@OnlyCurrentDoc
function onOpen(e) {
  var ui = SpreadsheetApp.getUi();
  ui.createMenu("Import CSV data 👉️")
    .addItem("Import from URL", "importCSVFromUrl")
    .addItem("Import from Drive", "importCSVFromDrive")
    .addToUi();
}

//Displays an alert as a Toast message
function displayToastAlert(message) {
  SpreadsheetApp.getActive().toast(message, "⚠️ Alert");
}

//Imports a CSV file at a URL into the Google Sheet
function importCSVFromUrl() {
  var url = promptUserForInput("Please enter the URL of the CSV file:");
  var contents = Utilities.parseCsv(UrlFetchApp.fetch(url));
  var sheetName = writeDataToSheet(contents);
  displayToastAlert("The CSV file was successfully imported into " + sheetName + ".");
}

//Imports a CSV file in Google Drive into the Google Sheet
function importCSVFromDrive() {
  var fileName = promptUserForInput("Please enter the name of the CSV file to import from Google Drive:");
  var files = findFilesInDrive(fileName);
  if(files.length === 0) {
    displayToastAlert("No files with name \"" + fileName + "\" were found in Google Drive.");
    return;
  } else if(files.length > 1) {
    displayToastAlert("Multiple files with name " + fileName +" were found. This program does not support picking the right file yet.");
    return;
  }
  var file = files[0];
  var contents = Utilities.parseCsv(file.getBlob().getDataAsString());
  var sheetName = writeDataToSheet(contents);
  displayToastAlert("The CSV file was successfully imported into " + sheetName + ".");
}

//Prompts the user for input and returns their response
function promptUserForInput(promptText) {
  var ui = SpreadsheetApp.getUi();
  var prompt = ui.prompt(promptText);
  var response = prompt.getResponseText();
  return response;
}

//Returns files in Google Drive that have a certain name.
function findFilesInDrive(filename) {
  var files = DriveApp.getFilesByName(filename);
  var result = [];
  while(files.hasNext())
    result.push(files.next());
  return result;
}

//Inserts a new sheet and writes a 2D array of data in it
function writeDataToSheet(data) {
  var ss = SpreadsheetApp.getActive();
  sheet = ss.insertSheet();
  sheet.getRange(1, 1, data.length, data[0].length).setValues(data);
  return sheet.getName();
}
Ideas to extend the script further
Here are some enhancements that you can consider making to the script:
Make your script run periodically by using a time-driven trigger. Depending on your use case, you might want to modify the writeDataToSheet() function to keep appending data to the same sheet versus creating new sheets.
Add an option to import CSV files from Gmail.
Automate your workflow even further by importing the CSV file, performing some analysis automatically and then emailing a report to your boss or your team.
If you'd like me to write a tutorial on any of the above topics (or some other topic), please let me know using the feedback form at the bottom of this post.
Conclusion
In this tutorial, you learned how to automatically import CSV files into a Google Sheet using Apps Script.
How was this tutorial?
Your feedback helps me create better content
DISCLAIMER: This content is provided for educational purposes only. All code, templates, and information should be thoroughly reviewed and tested before use. Use at your own risk. Full Terms of Service apply.
Small Scripts, Big Impact
Join 1,500+ professionals who are supercharging their productivity with Google Sheets™ automation
By subscribing, you agree to our Privacy Policy and Terms of Service

