Custom menus in Google Sheets
You can create custom menus in Google Sheets to make it easy for end users to access the functionality that you've developed using Google Apps Script.
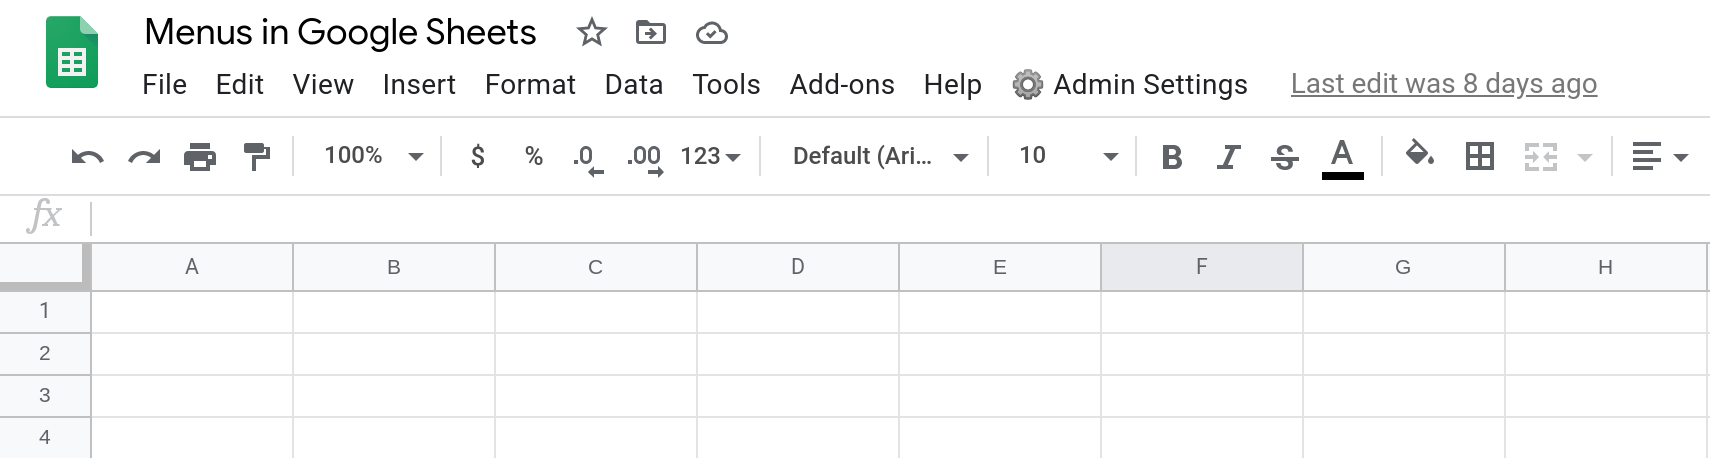
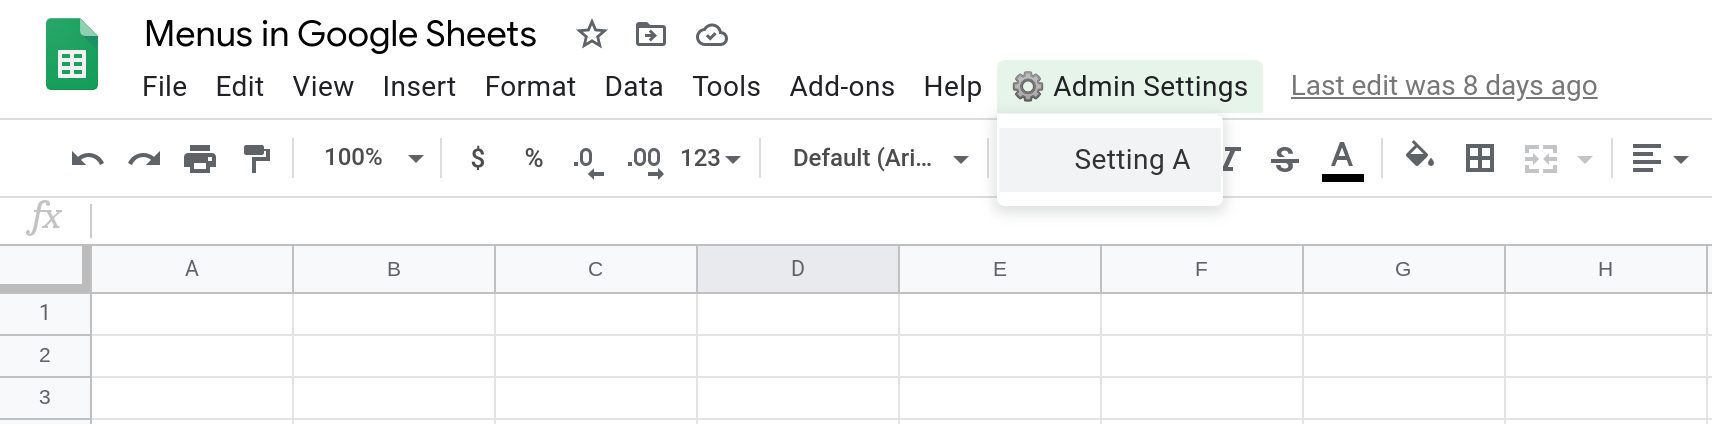
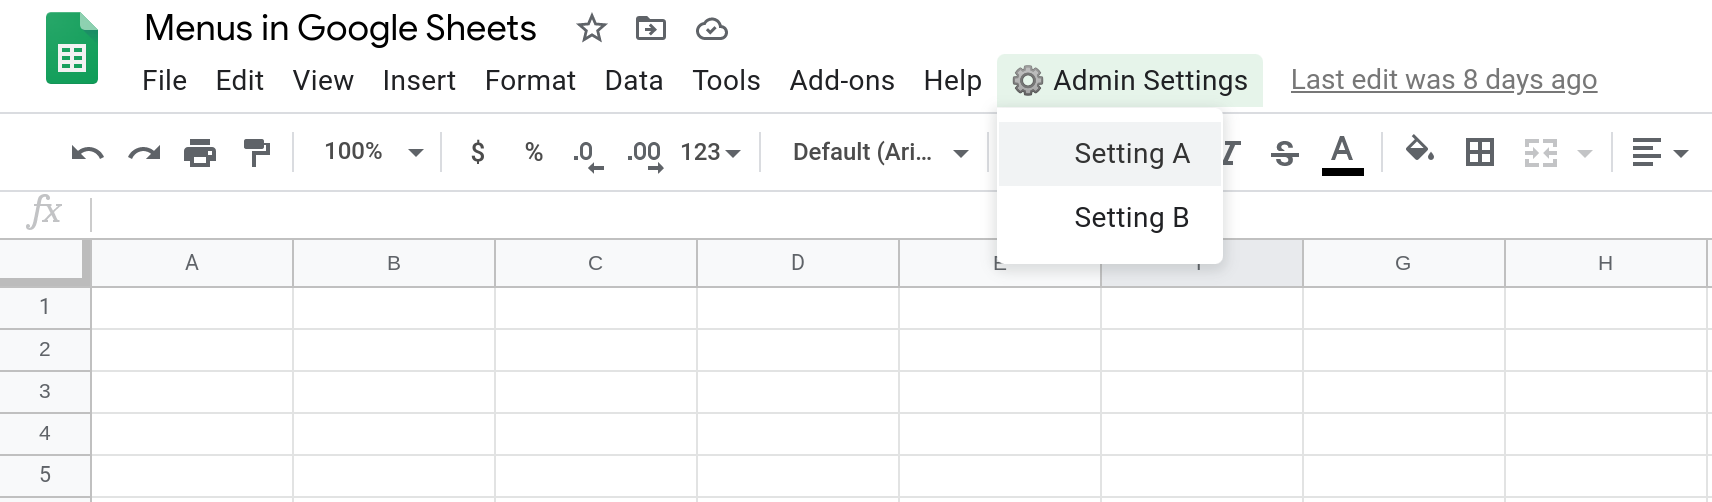
These custom menus will be displayed in the menu bar right next to the Help menu. The screenshot below shows a custom menu called ⚙️ Admin Settings.
Each menu item in the custom menu is associated with a Google Apps Script function. When a menu item is selected, its corresponding function will be run. For example, if the menu item Setting A is selected, the corresponding function settingA() will be run and this function will display a toast notification. You'll learn how to create this custom menu later on in this tutorial.

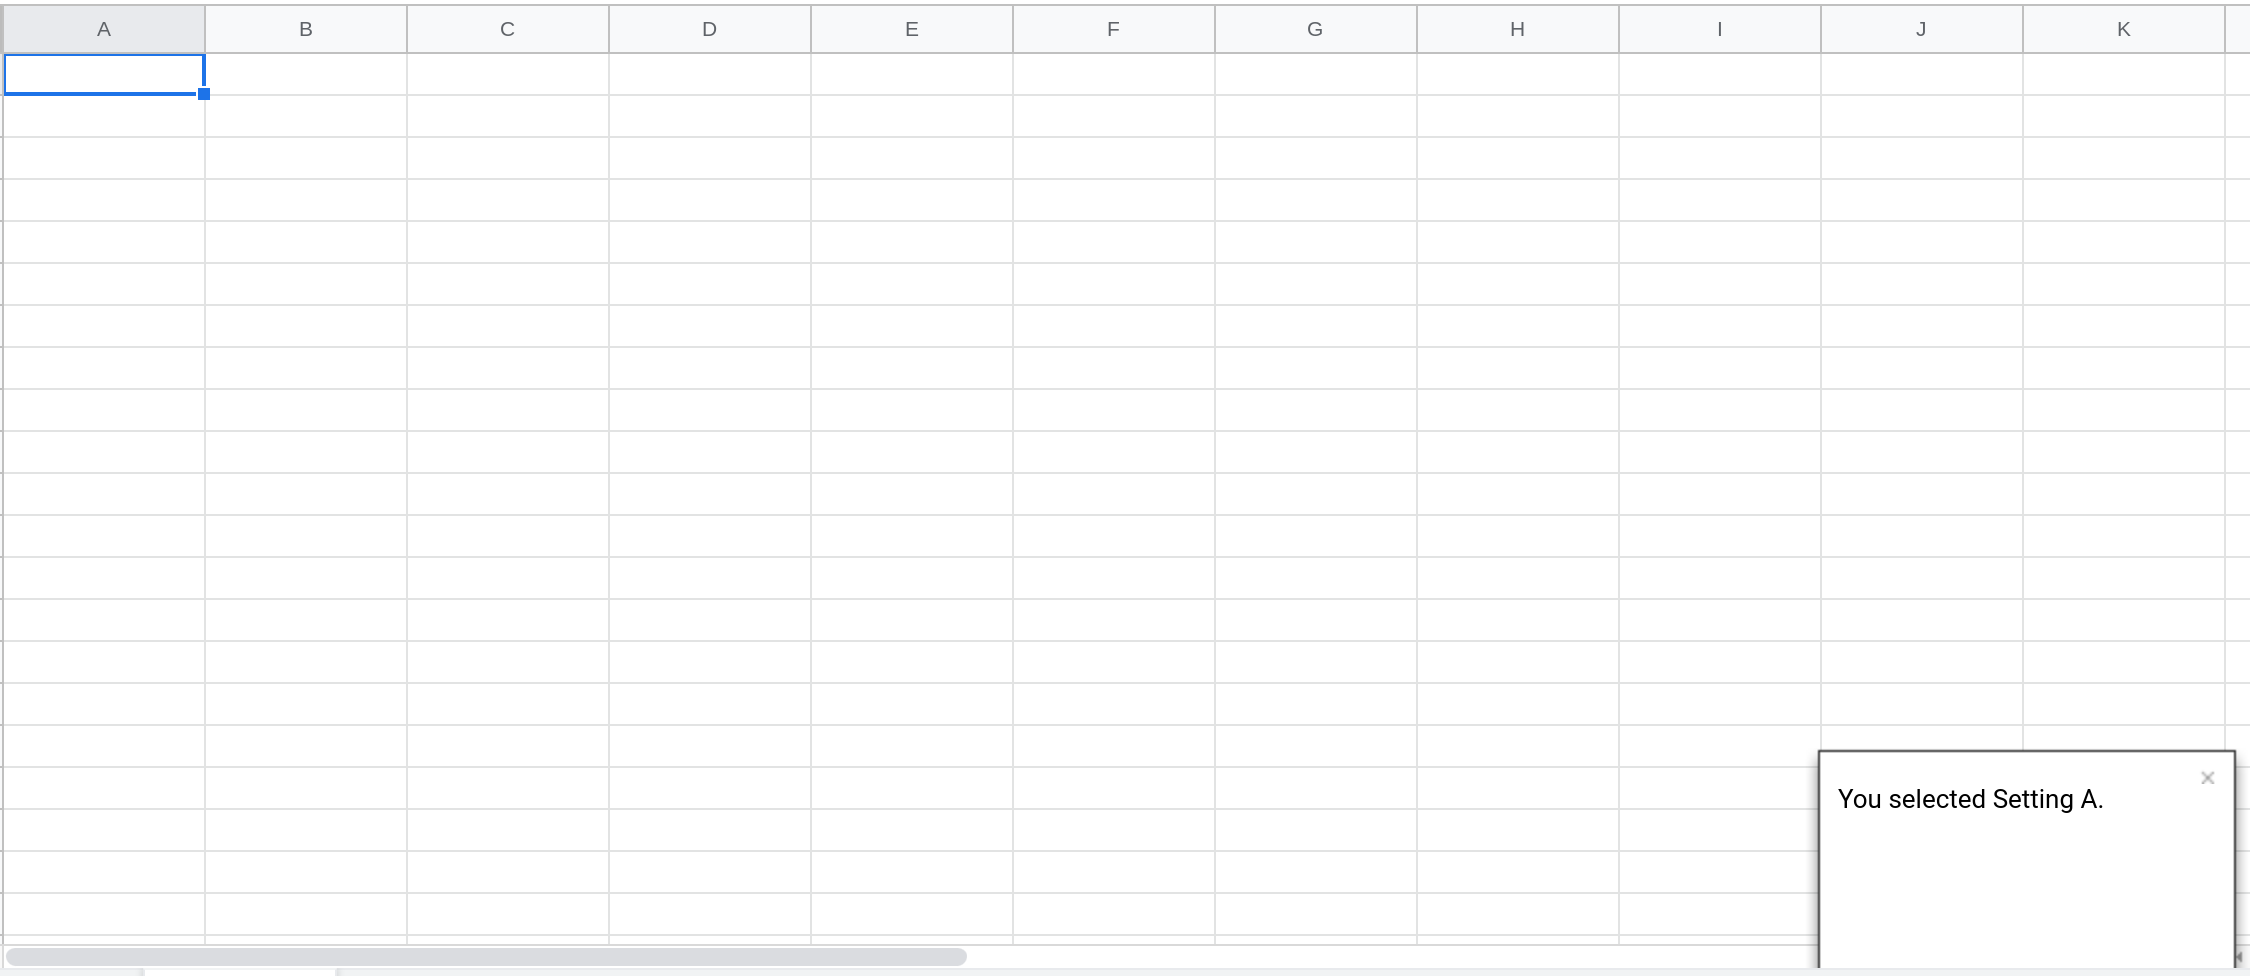
Selecting the menu item Setting A will result in the below notification being displayed.

Prerequisites
If you've never worked with Apps Script before, I've written an article that explains how to create and run your first apps script. I've also written a series of articles to teach you how to code using Google Sheets and Apps Script.
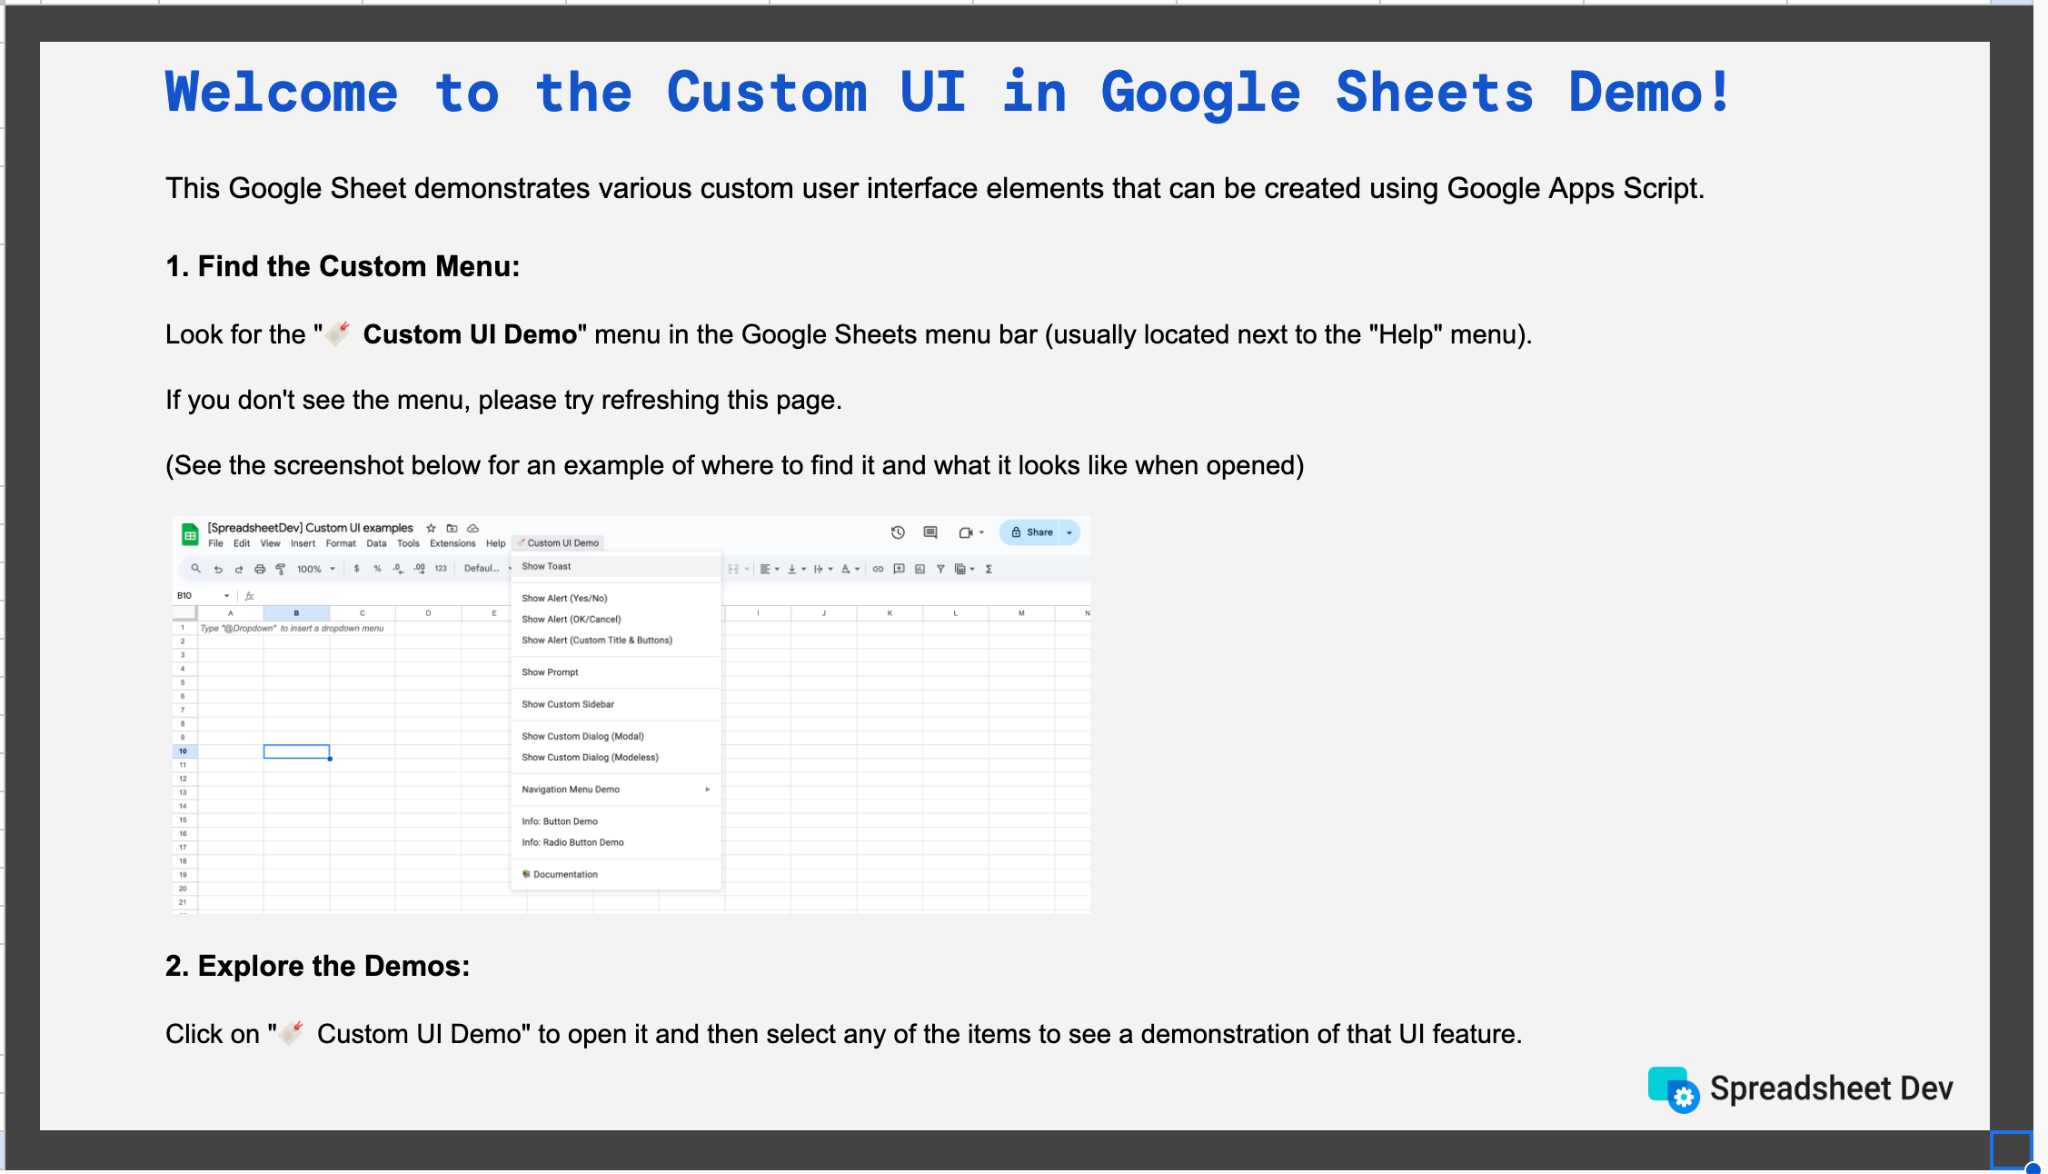
Google Sheets Custom UI Demo Template
Explore a variety of custom user interface options in Google Sheets! This template demonstrates custom menus, dialogs, sidebars, alerts, prompts, and more, all powered by Google Apps Script. A perfect way to learn and get inspired for your own projects.
Already a subscriber? Log in
When should you create a custom menu in a Google Sheets spreadsheet?
There are several use cases for creating a custom menu. Here are some of them:
You can make it easy for users to run Google Apps Script functions that are associated with your spreadsheet. Instead of opening the script editor and running a function, the user can run it from the spreadsheet itself by selecting the menu item that is associated with the function.
Even non-technical users that may not be comfortable navigating the script editor will be able to easily navigate a menu.
You can link to functions that require the user's authorization from a menu item and users will be asked to approve the necessary permissions when they select that menu item.
Note: Custom Functions cannot use functionality that requires user authorization but this restriction does not apply to functions associated with menu items in a Custom Menu.
How to create a custom menu in Google Sheets using Google Apps Script?
Creating a custom menu is very easy to do and only requires a few lines of code.
First, create a new Google Sheets spreadsheet or open an existing one where you want to create the custom menu.
★ Tip: You can create a new Google Sheets spreadsheet by opening the URL https://sheets.new in your web browser.
Then, open the script editor by selecting Extensions —> Apps Script. In the rest of this tutorial, you'll learn how to write some simple code in this script editor to create a custom menu.
🛈 A custom menu can only be created by a bound script
When you open the script editor from a Google Sheets spreadsheet, you're editing what is called a bound script. That is, the script is attached to the spreadsheet that it was created from. A custom menu can only be created by a bound script.
There is another type of script called a standalone script that is NOT bound to any G Suite document and these standalone scripts cannot create custom menus in a Google Sheets spreadsheet.
Creating a custom menu with a single menu item
The code below uses a variable called menu to create the custom menu, add items to it and then adds itself to the spreadsheet's user interface. Replace the code in the script editor with the code below.
function createEmptyMenu() {
   var menu = SpreadsheetApp.getUi().createMenu("⚙️ Admin Settings");
   menu.addItem("Setting A", "settingA");
   menu.addToUi();
}

function settingA() {
  SpreadsheetApp.getActive().toast("You selected Setting A.");
}
Running the above code will result in the "⚙️ Admin Settings" menu being displayed in your spreadsheet. Selecting the menu will display the Setting A menu item.
When you select the Setting A menu item, the function settingA() will be run and a toast notification will be displayed. You might be prompted to authorize your script if you haven't done so already.
🛈 A custom menu must have at least one menu item
You cannot create an empty custom menu. The menu must have at least one item added using the addItem() method.
The code to create the custom menu can be simplified by using a technique called chaining.
var menu = SpreadsheetApp.getUi().createMenu("⚙️ Admin Settings");
menu.addItem("Setting A", "settingA");
menu.addToUi();
Instead, you can just chain these operations together directly. Notice that there are no semicolons at the end of the first two statements. The .
SpreadsheetApp.getUi().createMenu("⚙️ Admin Settings")
  .addItem("Setting A", "settingA")
  .addToUi();
So the full code now becomes a bit easier to read.
function createEmptyMenu() {
   SpreadsheetApp.getUi().createMenu("⚙️ Admin Settings")
     .addItem("Setting A", "settingA")
     .addToUi();
}

function settingA() {
  SpreadsheetApp.getActive().toast("You selected Setting A.");
}
Creating a custom menu with two menu items
The code below will create a custom menu with two menu items. Notice that there are two .addItem() statements chained together.
When the menu item Setting A is selected, the function settingA() will be run and when Setting B is selected, settingB() will be run.
function createMenu() {
   SpreadsheetApp.getUi().createMenu("⚙️ Admin Settings")
    .addItem("Setting A", "settingA")
    .addItem("Setting B", "settingB")
    .addToUi();
}

function settingA() {
  SpreadsheetApp.getActive().toast("You selected Setting A.");
}

function settingB() {
  SpreadsheetApp.getActive().toast("You selected Setting B.");
}
Replace the code in the script editor with the above code and run the createMenu() function. You should see two menu items in the custom menu.
Organizing the menu items in your custom menu
When your custom menu has multiple items, it can be useful to organize them to make it easier for users to find the right one. There are two ways to organize menu items:
Use a line separator to separate menu items that belong to different categories.
Create sub menus when you have lots of menu items.
Use a line separator to separate menu items that belong to different categories
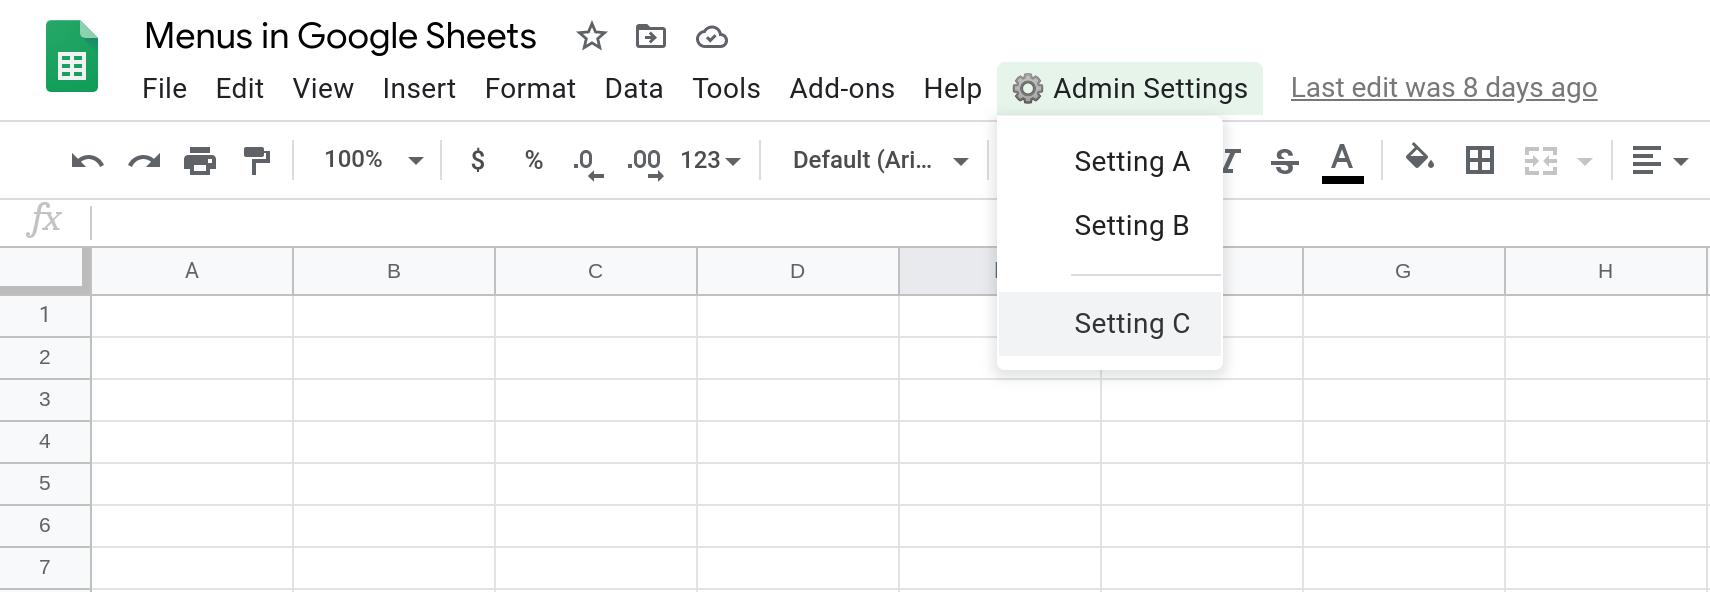
The code below will add a line separator between menu items Setting B and Setting C. If settings A and B belong to a different category compared to setting C, the line separator will make it easier for your users to navigate the menu.
function createMenuWithSeparator() {
   SpreadsheetApp.getUi().createMenu("⚙️ Admin Settings")
    .addItem("Setting A", "settingA")
    .addItem("Setting B", "settingB")
    .addSeparator()
    .addItem("Setting C", "settingC")
    .addToUi();
}

function settingA() {
  SpreadsheetApp.getActive().toast("You selected Setting A.");
}

function settingB() {
  SpreadsheetApp.getActive().toast("You selected Setting B.");
}

function settingC() {
  SpreadsheetApp.getActive().toast("You selected Setting C.");
}
The custom menu below has a line separator between Setting B and Setting C.
Create sub menus when you have lots of menu items
When you have lots of menu items, use sub menus to organize them in the menu. In the screenshot below, you'll notice that Setting D and Setting E have been organized under a sub menu called Advanced.
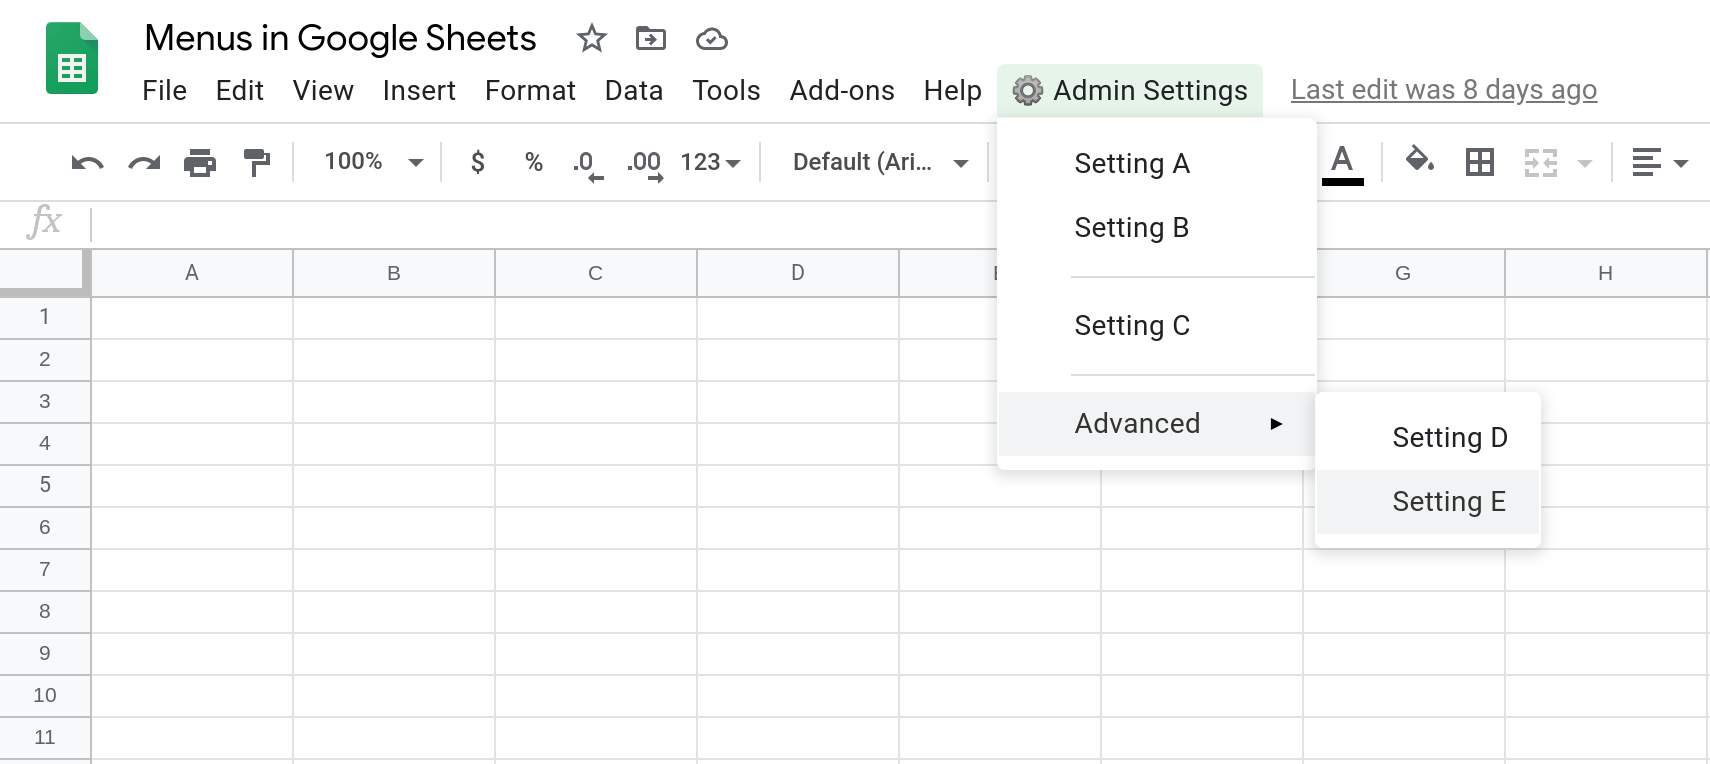
The code below creates the menu shown in the above screenshot. The addSubMenu() method is used to add a sub menu to the menu.
function createMenuWithSubMenu() {
  var subMenu = SpreadsheetApp.getUi().createMenu("Advanced")
    .addItem("Setting D", "settingD")
    .addItem("Setting E", "settingE");

  SpreadsheetApp.getUi().createMenu("⚙️ Admin Settings")
    .addItem("Setting A", "settingA")
    .addItem("Setting B", "settingB")
    .addSeparator()
    .addItem("Setting C", "settingC")
    .addSeparator()
    .addSubMenu(subMenu)
    .addToUi();
}

function settingA() {
  SpreadsheetApp.getActive().toast("You selected Setting A.");
}

function settingB() {
  SpreadsheetApp.getActive().toast("You selected Setting B.");
}

function settingC() {
  SpreadsheetApp.getActive().toast("You selected Setting C.");
}

function settingD() {
  SpreadsheetApp.getActive().toast("You selected Setting D.");
}

function settingE() {
  SpreadsheetApp.getActive().toast("You selected Setting E.");
}
Create the custom menu automatically when the spreadsheet is opened
In the above examples, we had to run a function to create the custom menu. However, what we really want is for the custom menu to be displayed automatically without having to run any function. We can implement this using an onOpen() simple trigger.
If you're not familiar with triggers, please refer to the following tutorial: Triggers in Google Sheets.
In the code below, the function onOpen() will be run automatically whenever your spreadsheet is opened. This function then creates the menu by running createMenuWithSubMenu().
function onOpen() {
  createMenuWithSubMenu();
}

function createMenuWithSubMenu() {
  var subMenu = SpreadsheetApp.getUi().createMenu("Advanced")
    .addItem("Setting D", "settingD")
    .addItem("Setting E", "settingE");

  SpreadsheetApp.getUi().createMenu("⚙️ Admin Settings")
    .addItem("Setting A", "settingA")
    .addItem("Setting B", "settingB")
    .addSeparator()
    .addItem("Setting C", "settingC")
    .addSeparator()
    .addSubMenu(subMenu)
    .addToUi();
}

function settingA() {
  SpreadsheetApp.getActive().toast("You selected Setting A.");
}

function settingB() {
  SpreadsheetApp.getActive().toast("You selected Setting B.");
}

function settingC() {
  SpreadsheetApp.getActive().toast("You selected Setting C.");
}

function settingD() {
  SpreadsheetApp.getActive().toast("You selected Setting D.");
}

function settingE() {
  SpreadsheetApp.getActive().toast("You selected Setting E.");
}
🛈 How to remove custom menus?
Once a custom menu has been created, you cannot remove it using Apps Script code. However, since a custom menu needs to be created each time the spreadsheet is opened, you can delete (or comment out) the code that creates the menu and then reload your spreadsheet in your browser. The custom menu will not appear since the code that creates it will no longer run.
Conclusion
In this tutorial, you learned how to create custom menus in Google Sheets using Google Apps Script.
Thanks for reading.
How was this tutorial?
Your feedback helps me create better content
DISCLAIMER: This content is provided for educational purposes only. All code, templates, and information should be thoroughly reviewed and tested before use. Use at your own risk. Full Terms of Service apply.
Small Scripts, Big Impact
Join 1,500+ professionals who are supercharging their productivity with Google Sheets™ automation
By subscribing, you agree to our Privacy Policy and Terms of Service
